

Party Noise Maker
Check out the YouTube video!
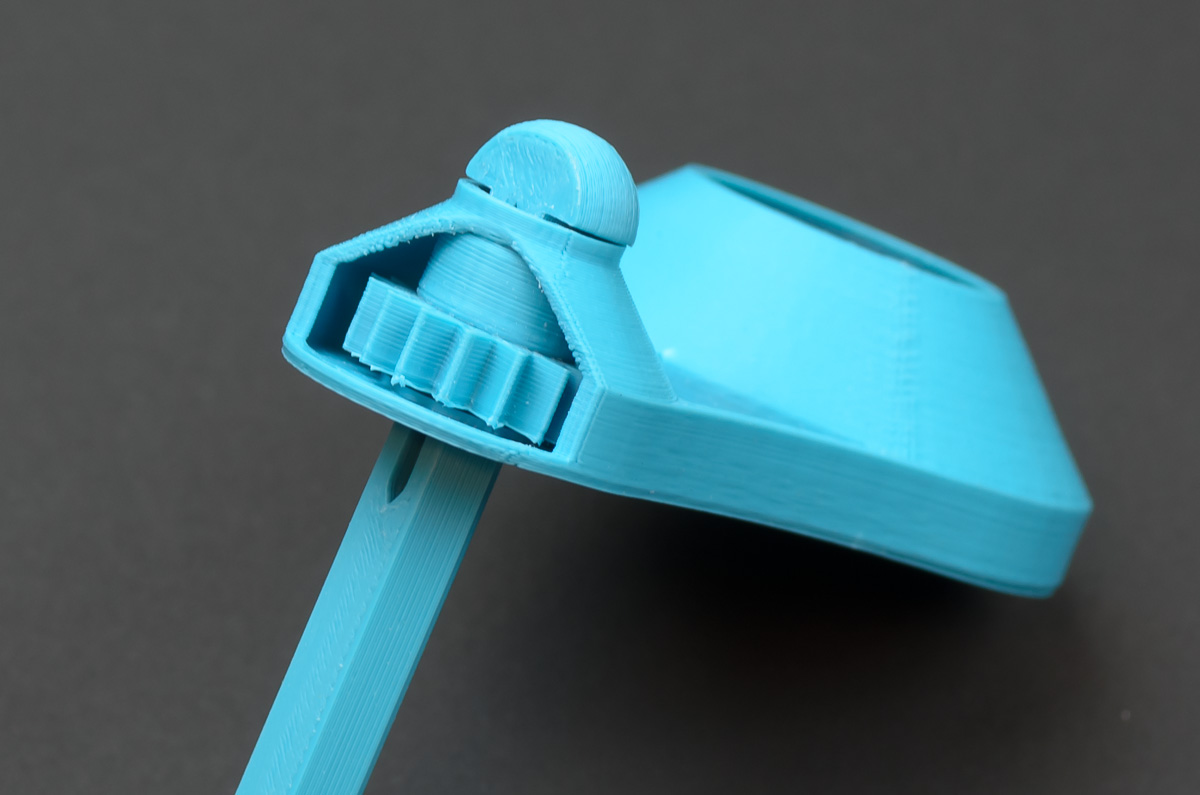
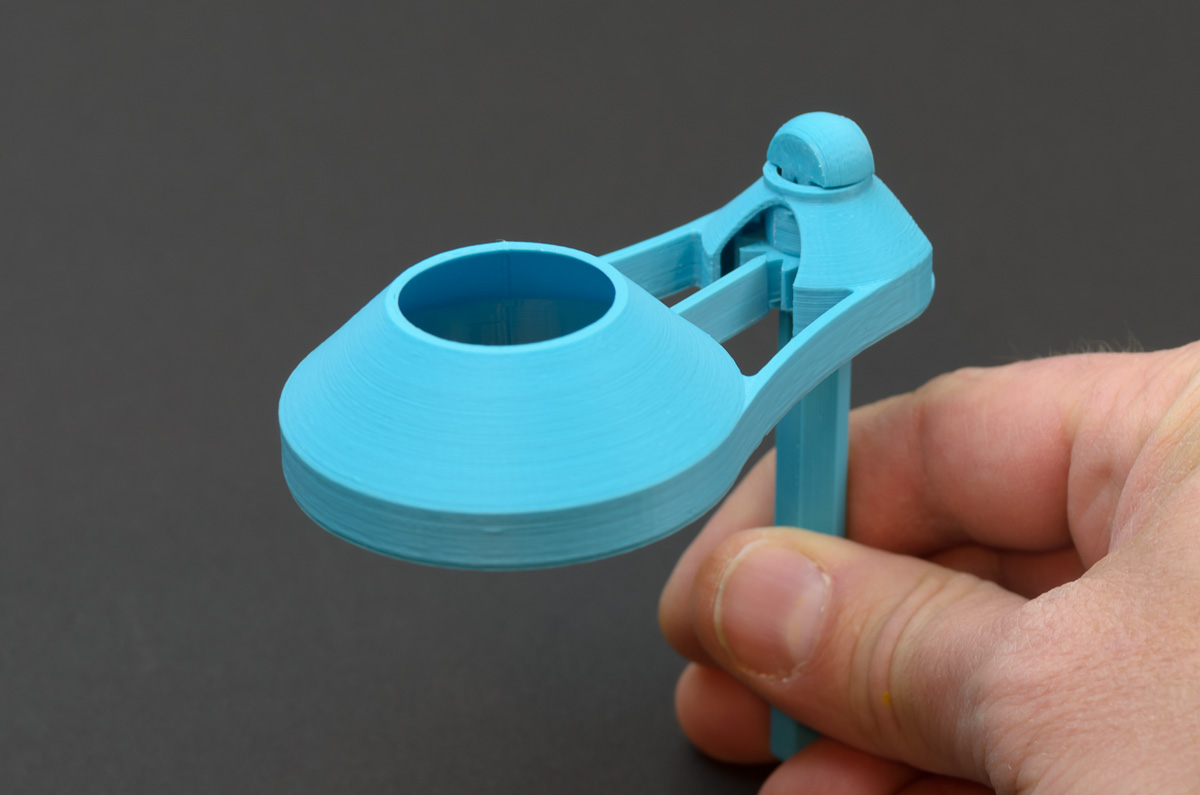
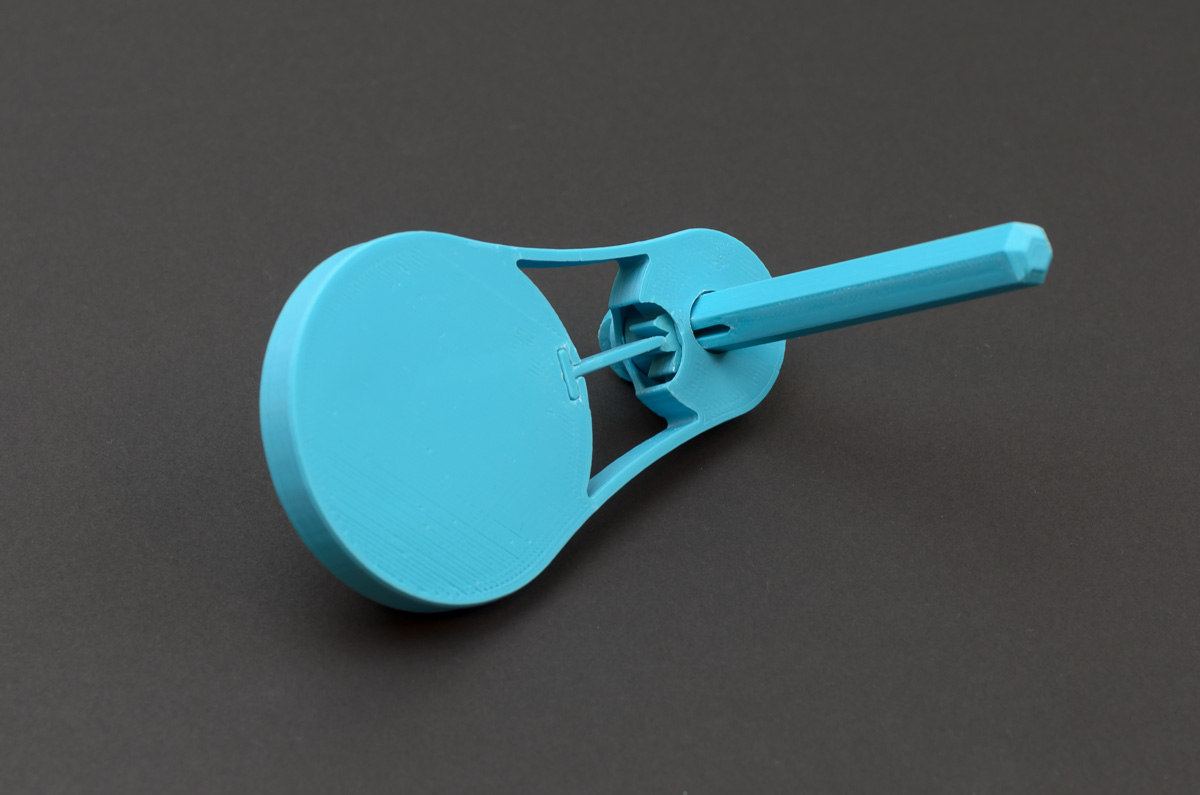
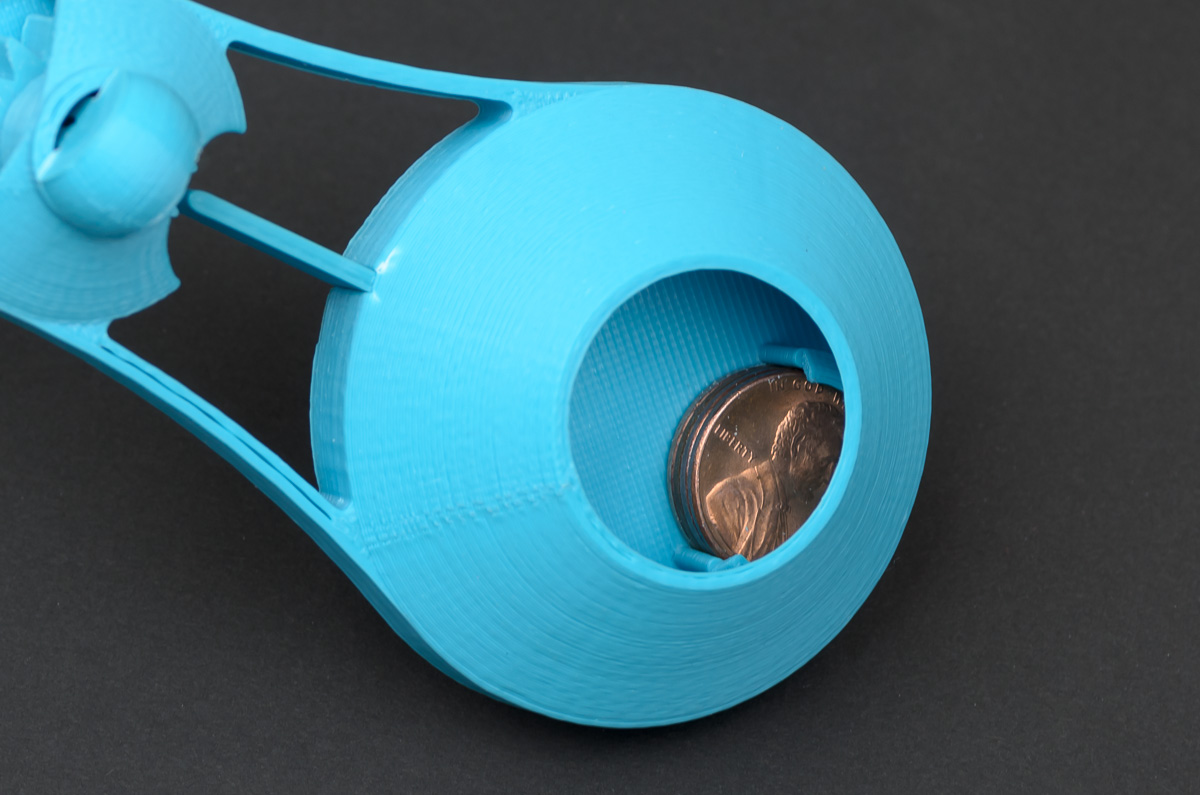
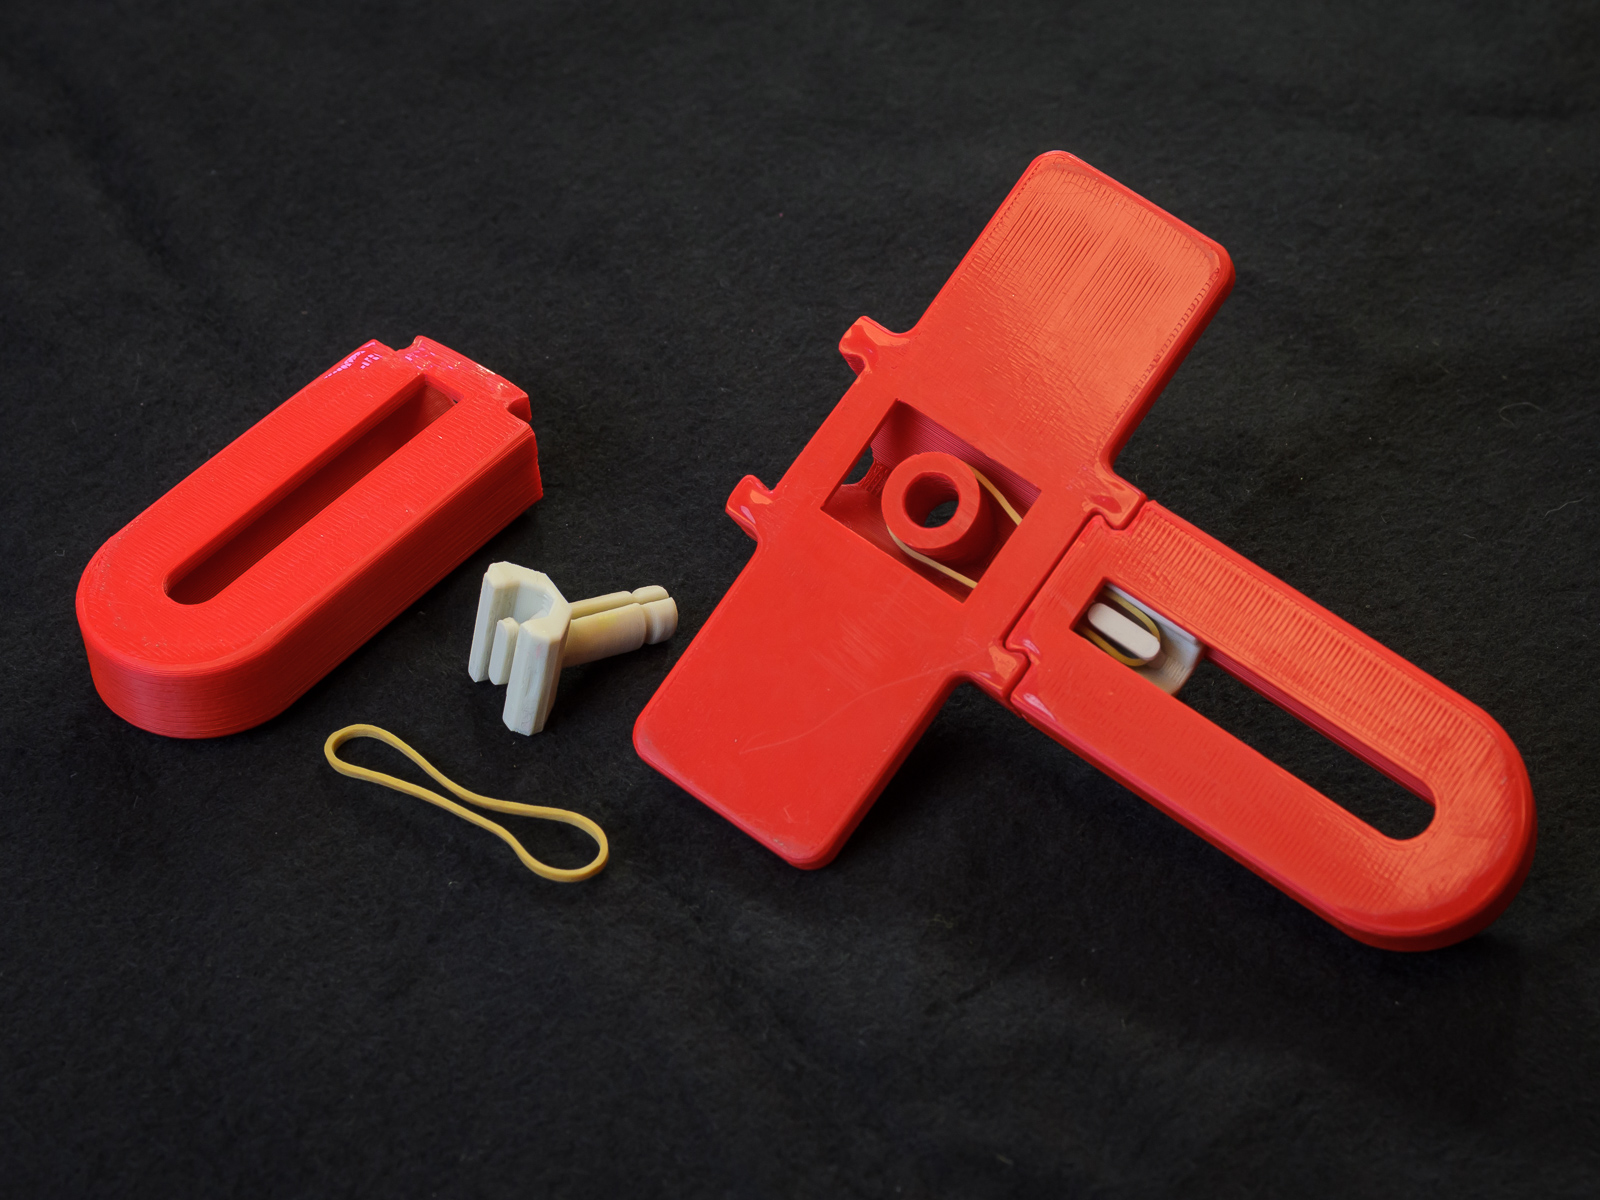
This Party Noise-Maker is an original design by Bernie Solo. It's easy to print and assemble. The new clicker design is less likely to break. NOTE: Be sure to fine tune the clicker stem so that it JUST BARELY contacts the clicker gear. This will help to make it last longer. The sound chamber makes it quite loud. Using 4-5 U.S. pennies as weight inside sound chamber will help it spin better. These can be installed with a little dab of hot glue.
I printed with 0.2 mm layer thickness and 20% fill. That seems to work well. It prints without raft or support!
The spacer ring goes in above (and before) the gear with it's beveled edge up, away from gear. The handle goes in the top, and out the bottom. You should hear a click when it snaps into the gear.
The clicker part is a separate, replaceable piece. It can wear out from heavy partying. The removable circular tabs are provided to help the thin clicker stick to the build platform. Break them off after printing, then file or sand rough edges. The clicker should fit snug in the T-slot. The T-slot in the main housing may need to be filed or trimmed to allow the clicker to slide in.

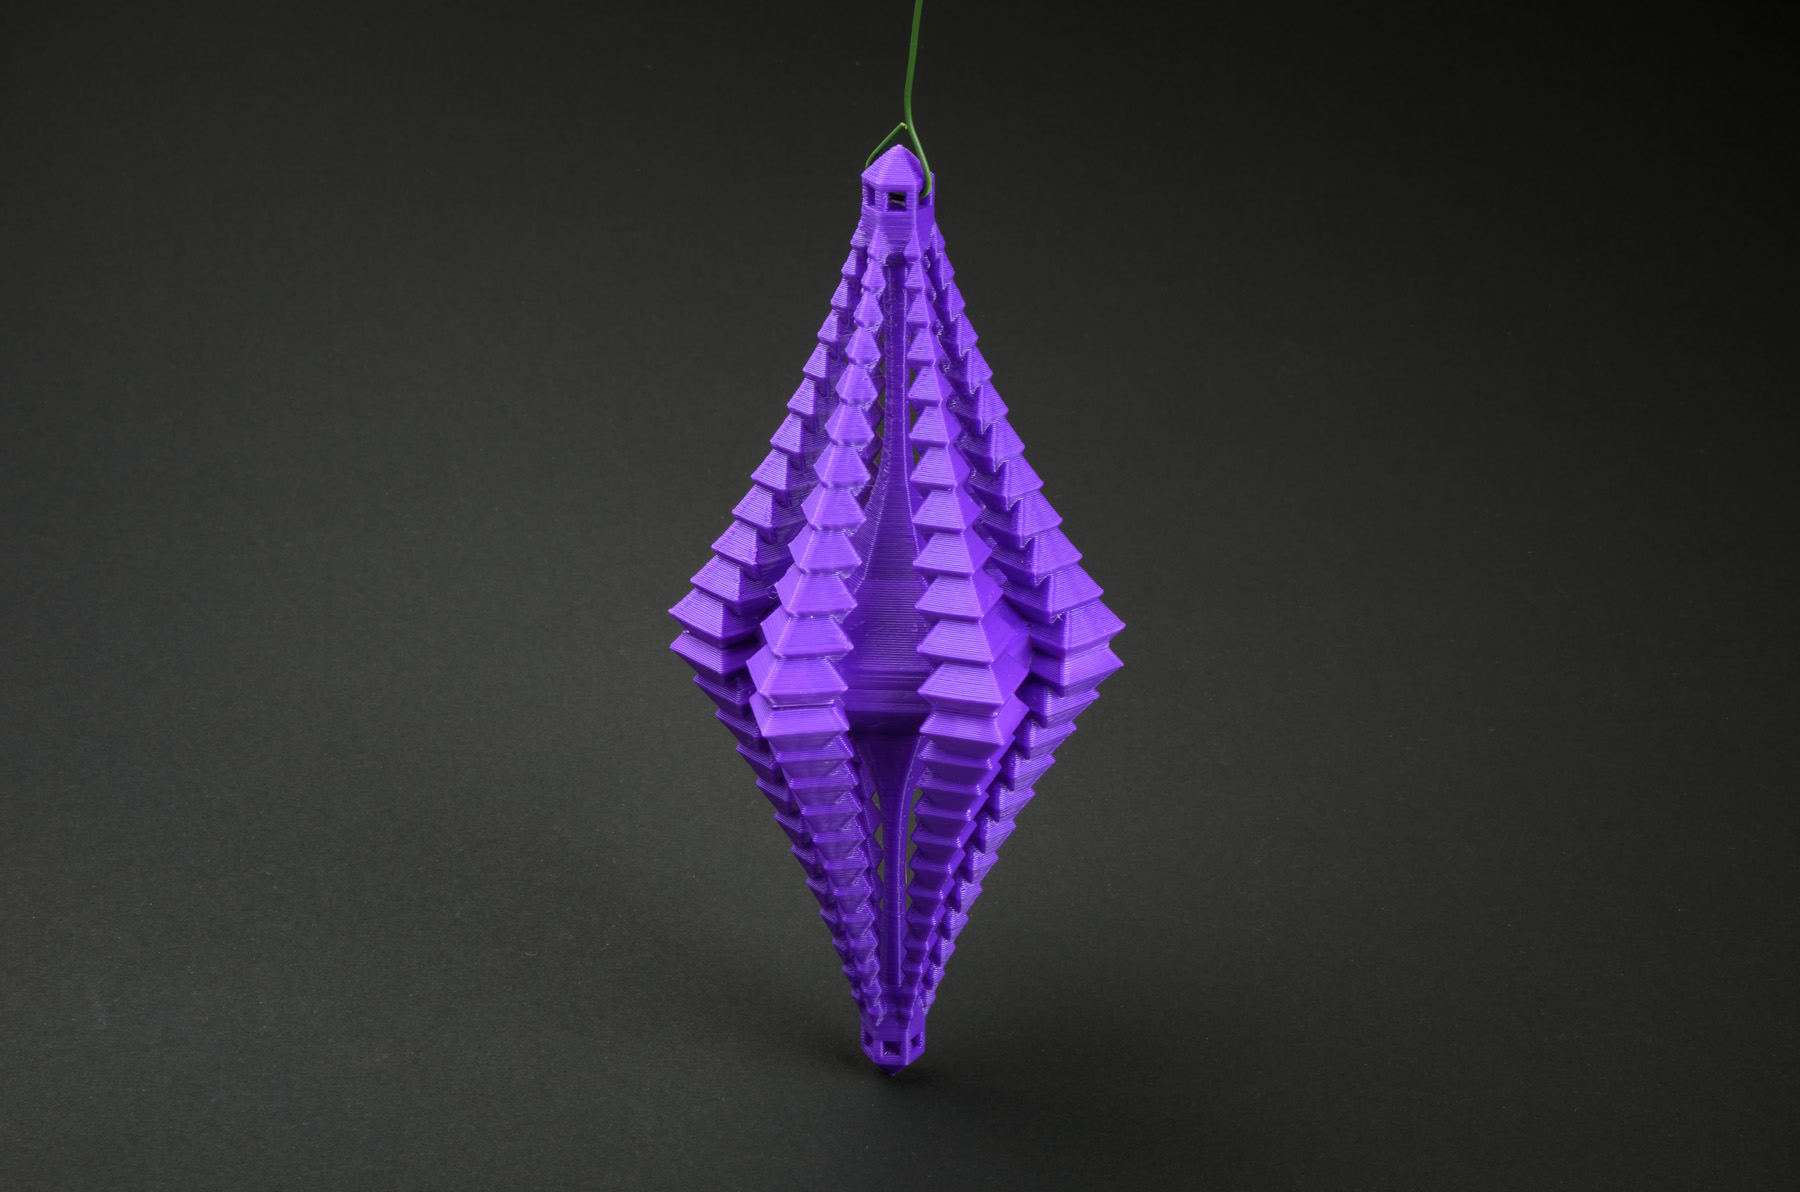
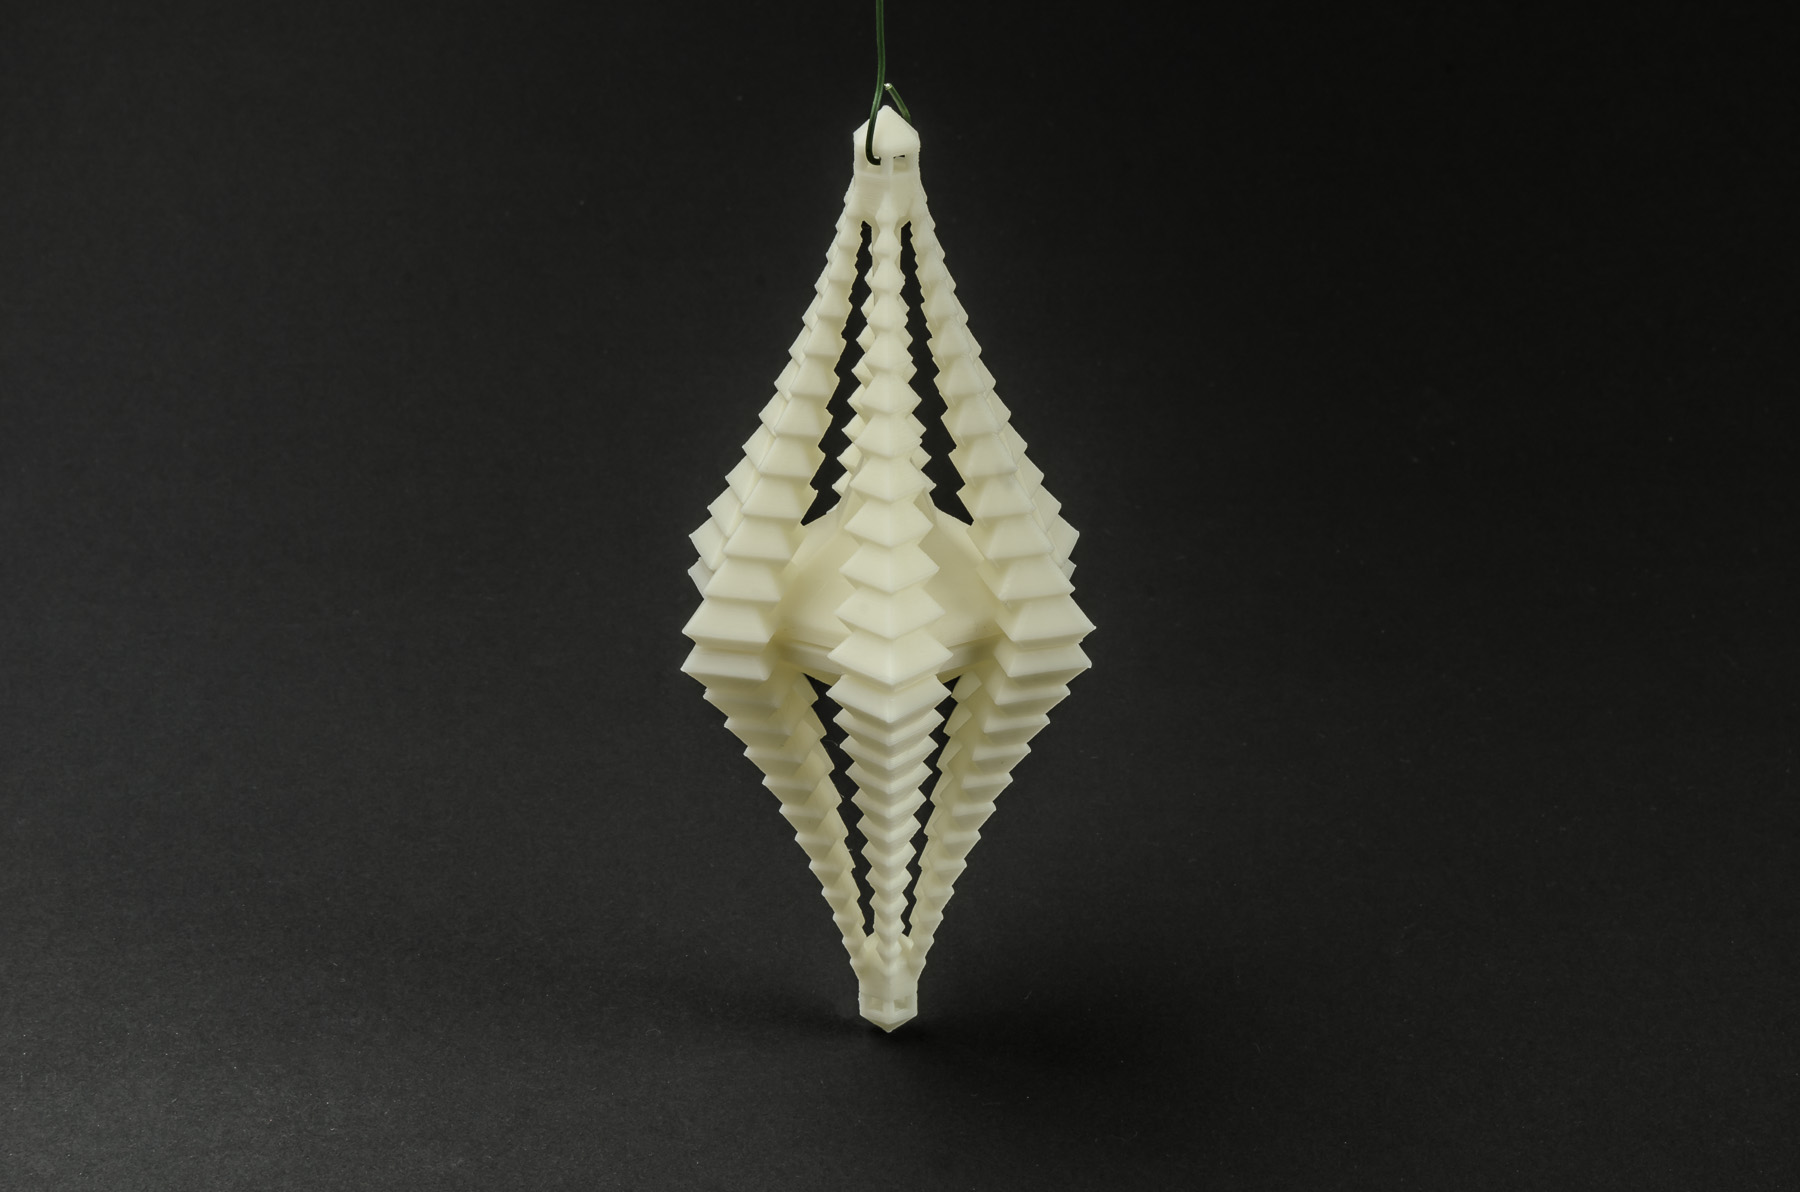
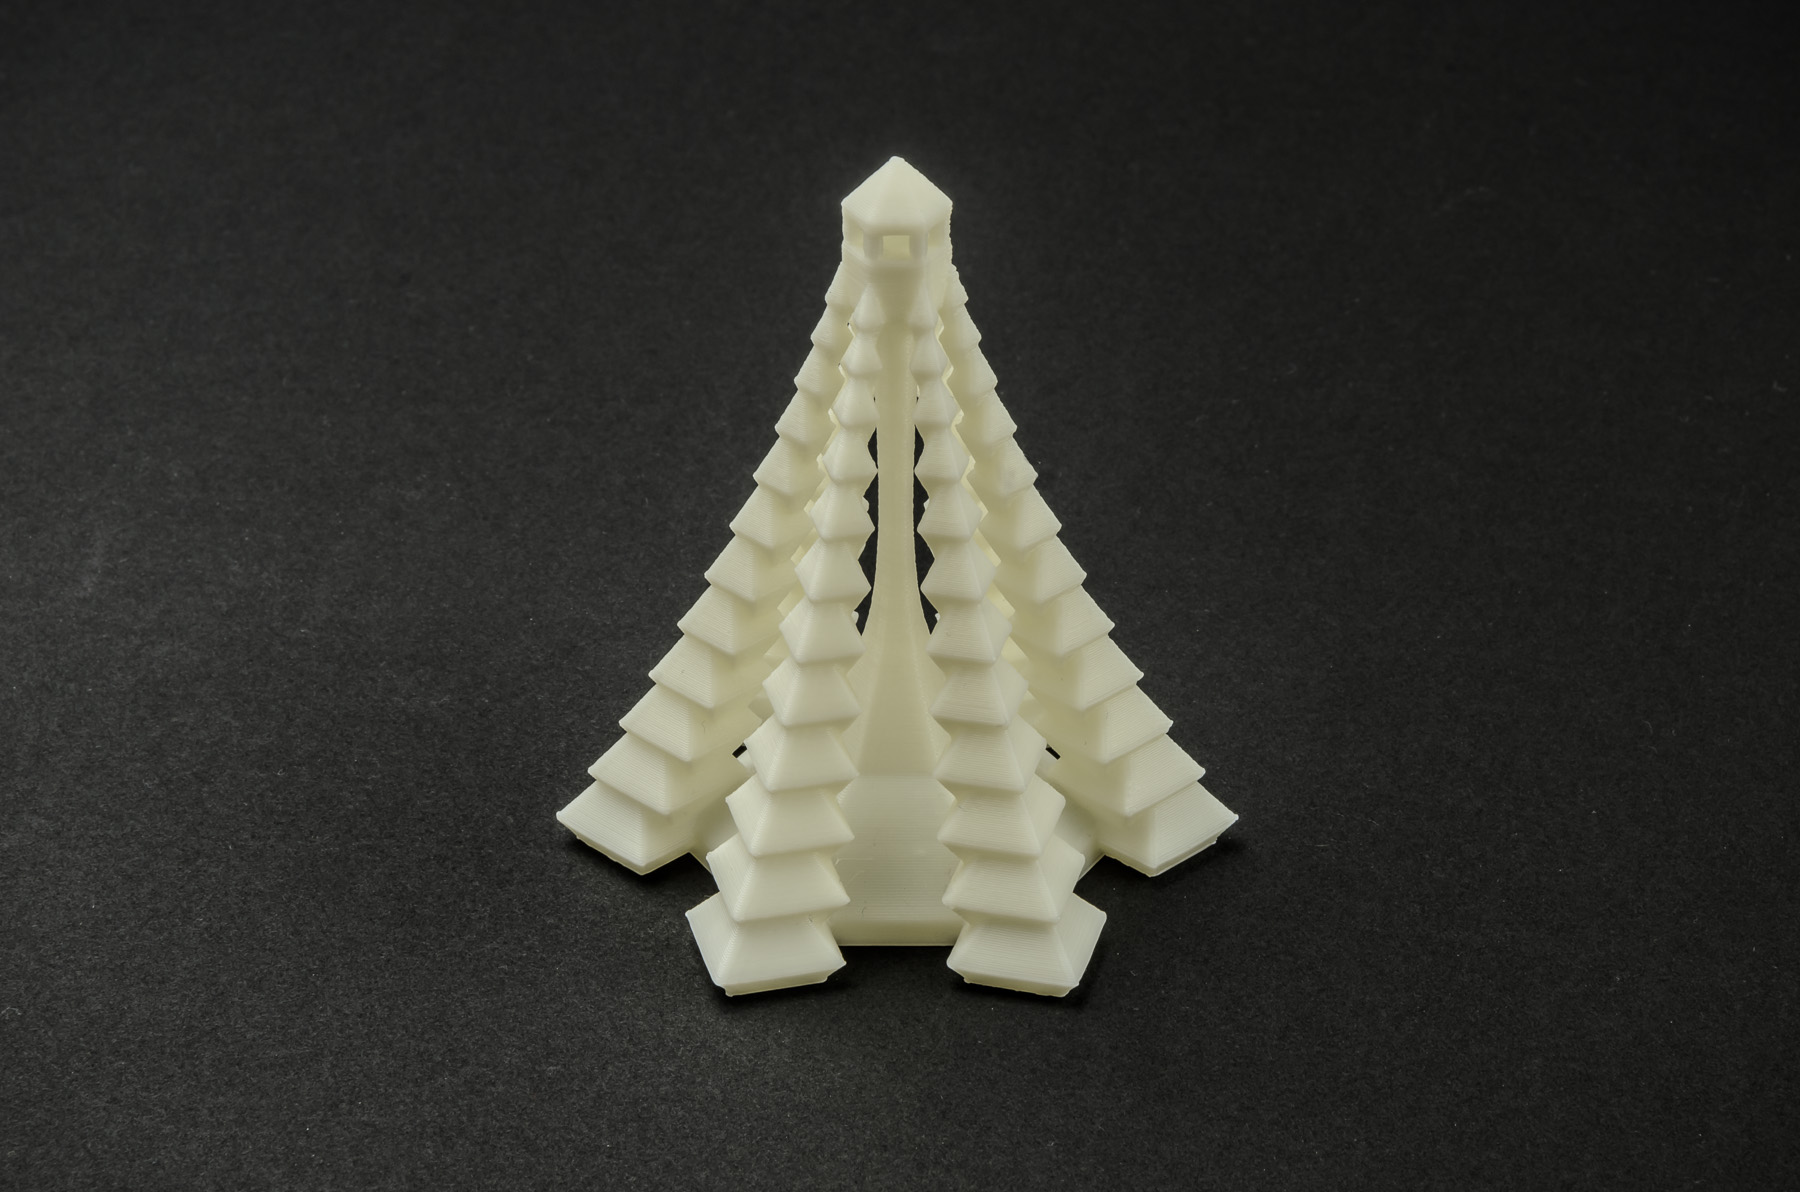

Crystal Facet Ornament
This was our entry into the MakerBot Ornaments Challenge a few years ago. This design has an overall traditional shape with stacked facets that give it an up to date look. At it's widest cross section you can see that it is derived from a snowflake's six sided crystal shape! There is space inside for an LED and battery, if you're so inclined to hack this.
This model was created with 3D printing in mind, so the layers stack cleanly. We recommend printing this design with 0% fill and two shells, at 0.2 mm layer thickness or thinner. This keeps it very translucent. No support needed. Simply align and glue the two identical halves together. This also looks good as just the top half, somewhat resembling a Christmas tree.
I look forward to seeing this printed with one of the many transparent filaments. If you print a clear one please share!
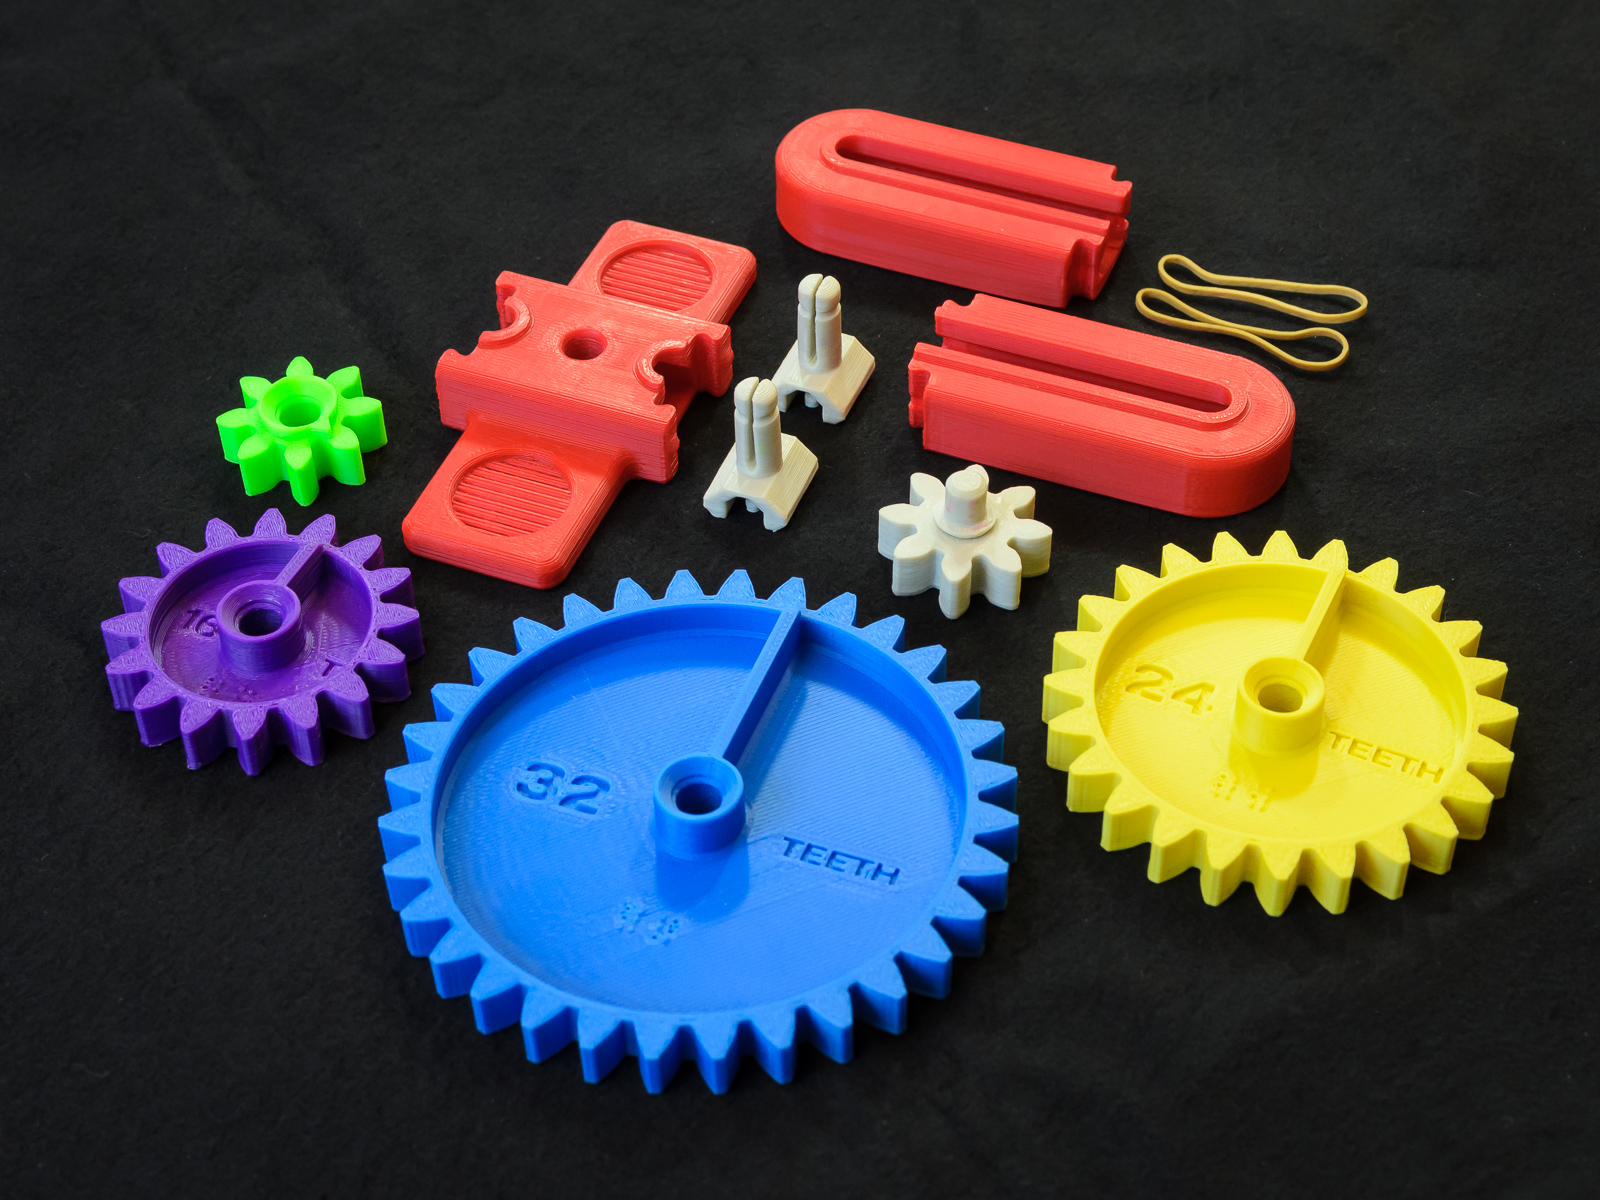
Math Gear(s)
NEW VERSION!!! Now with braille numbers and easy to feel direction indicator!
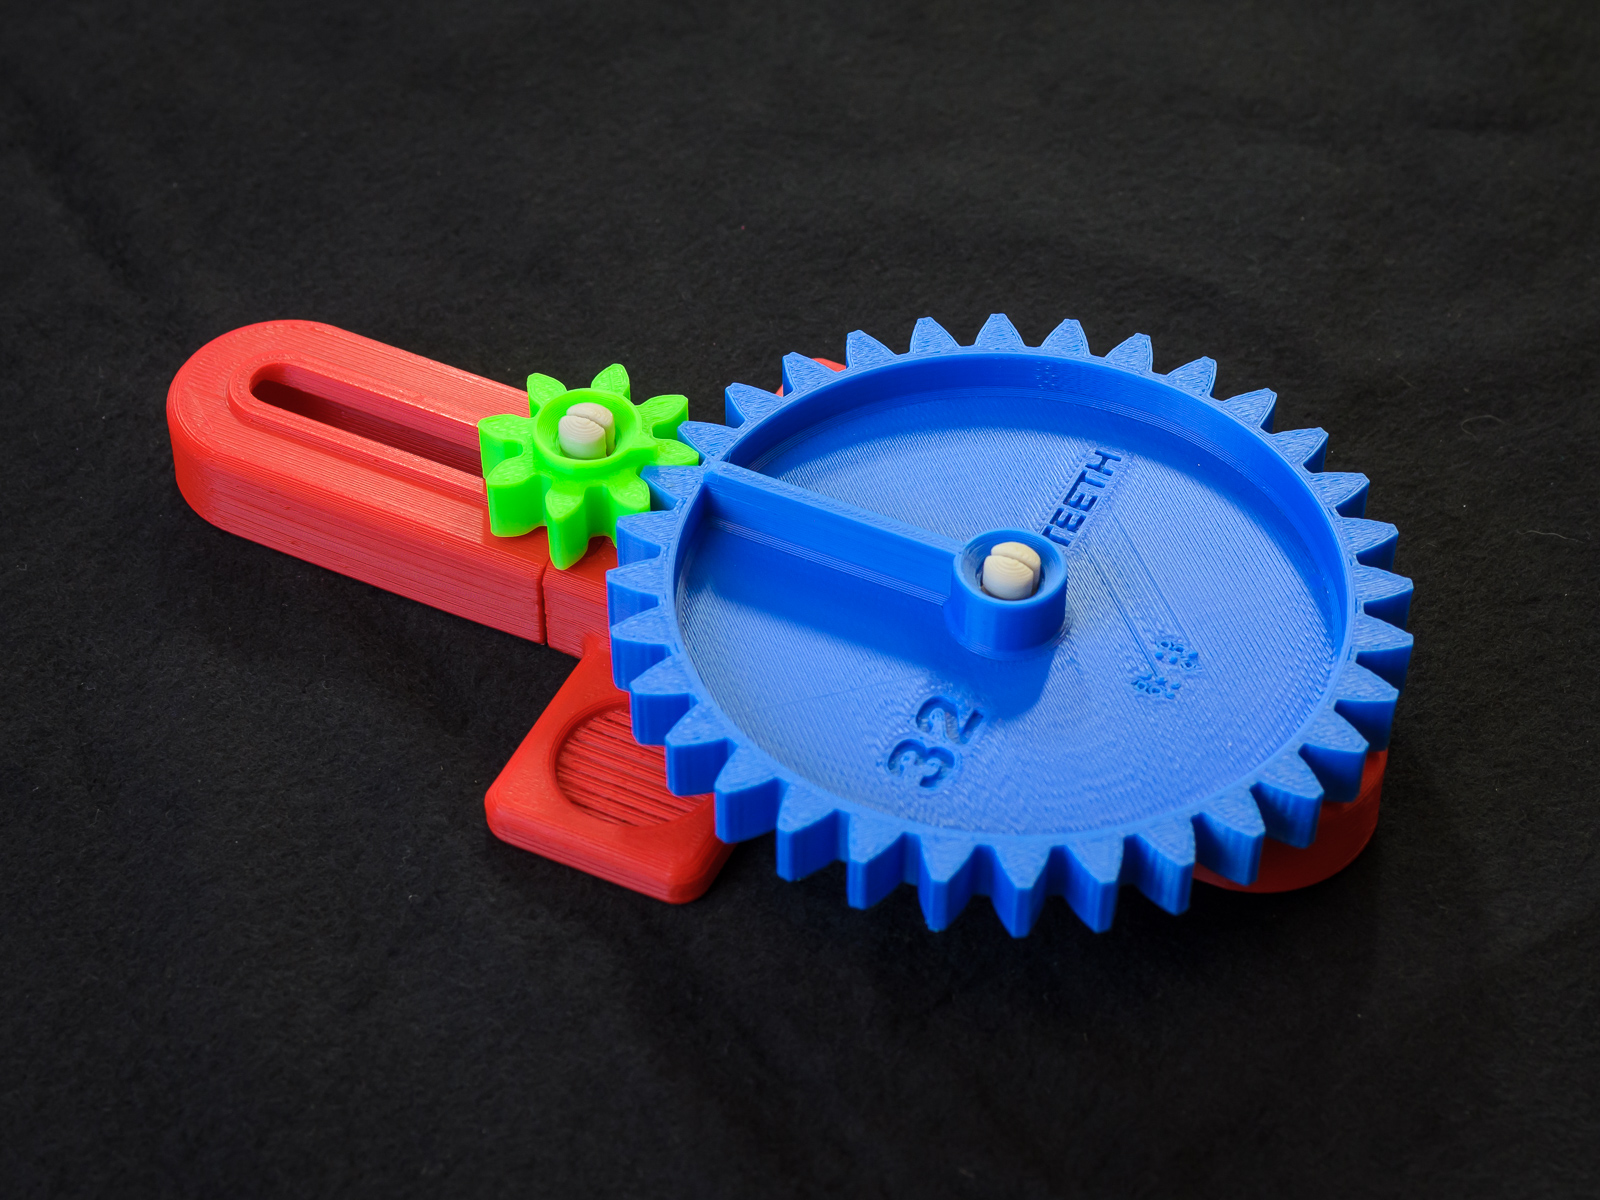
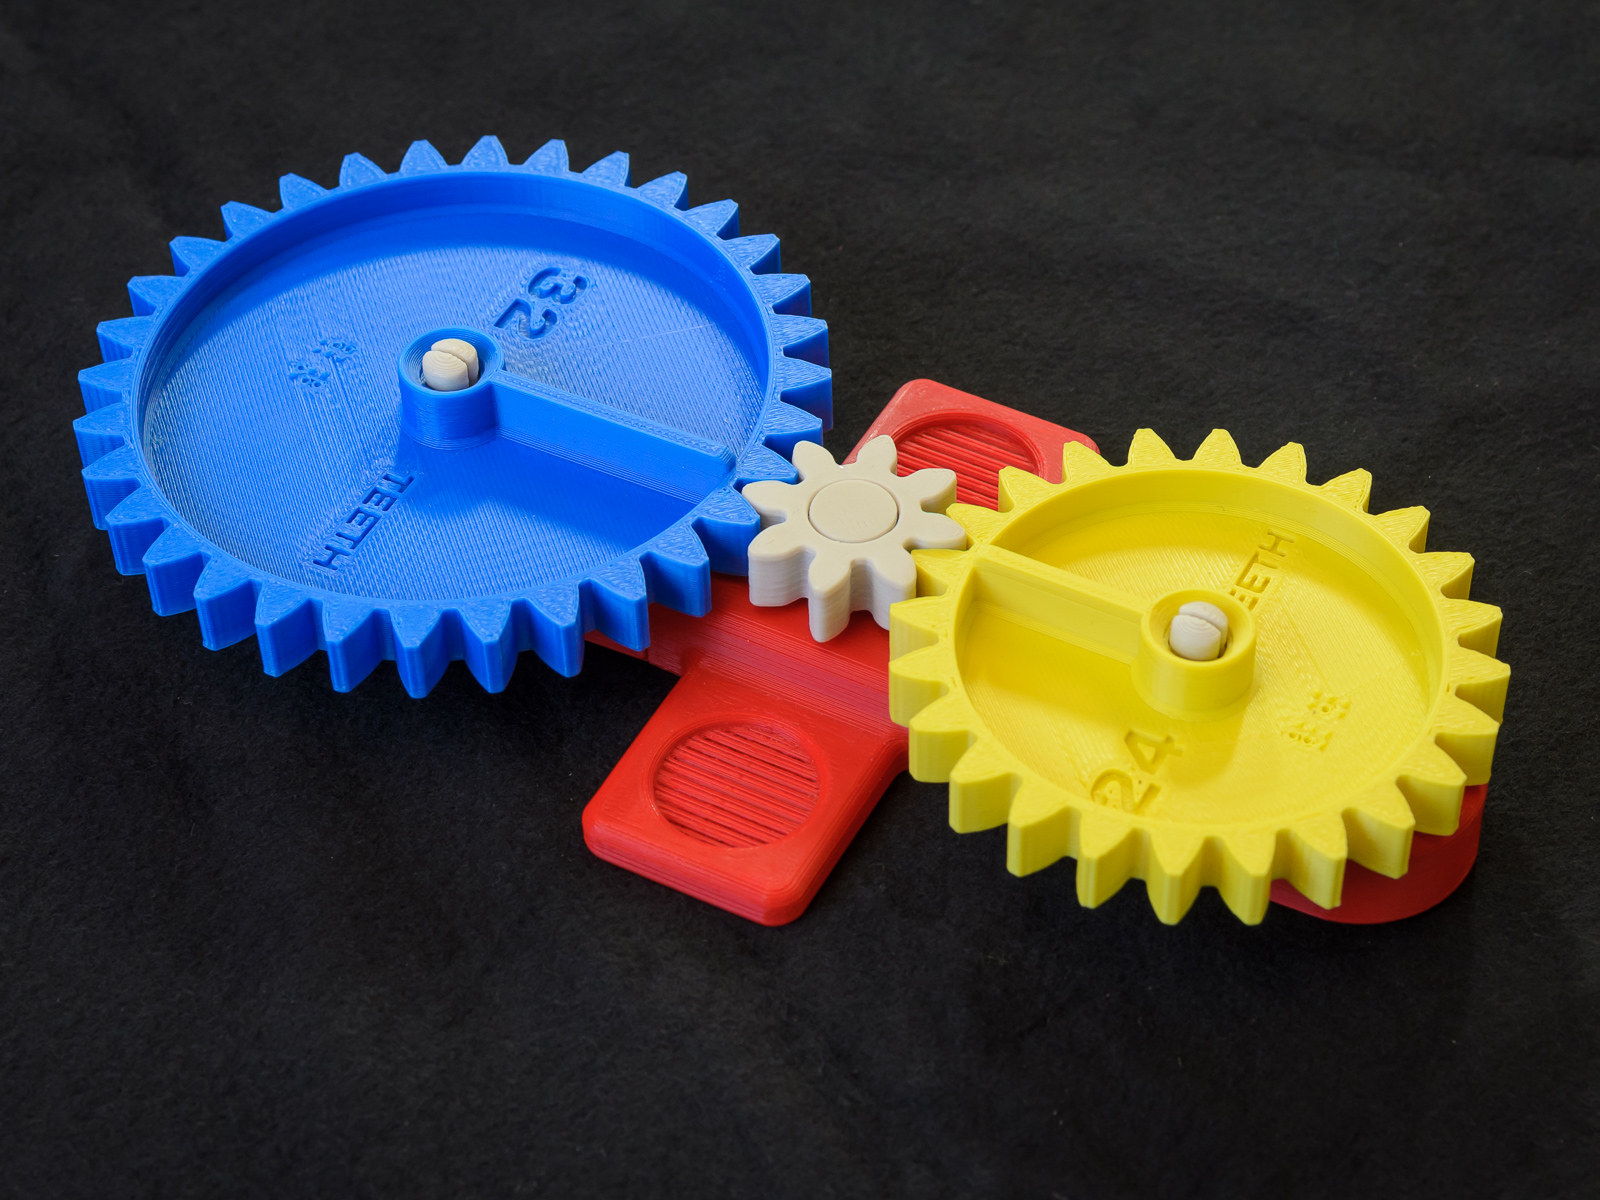
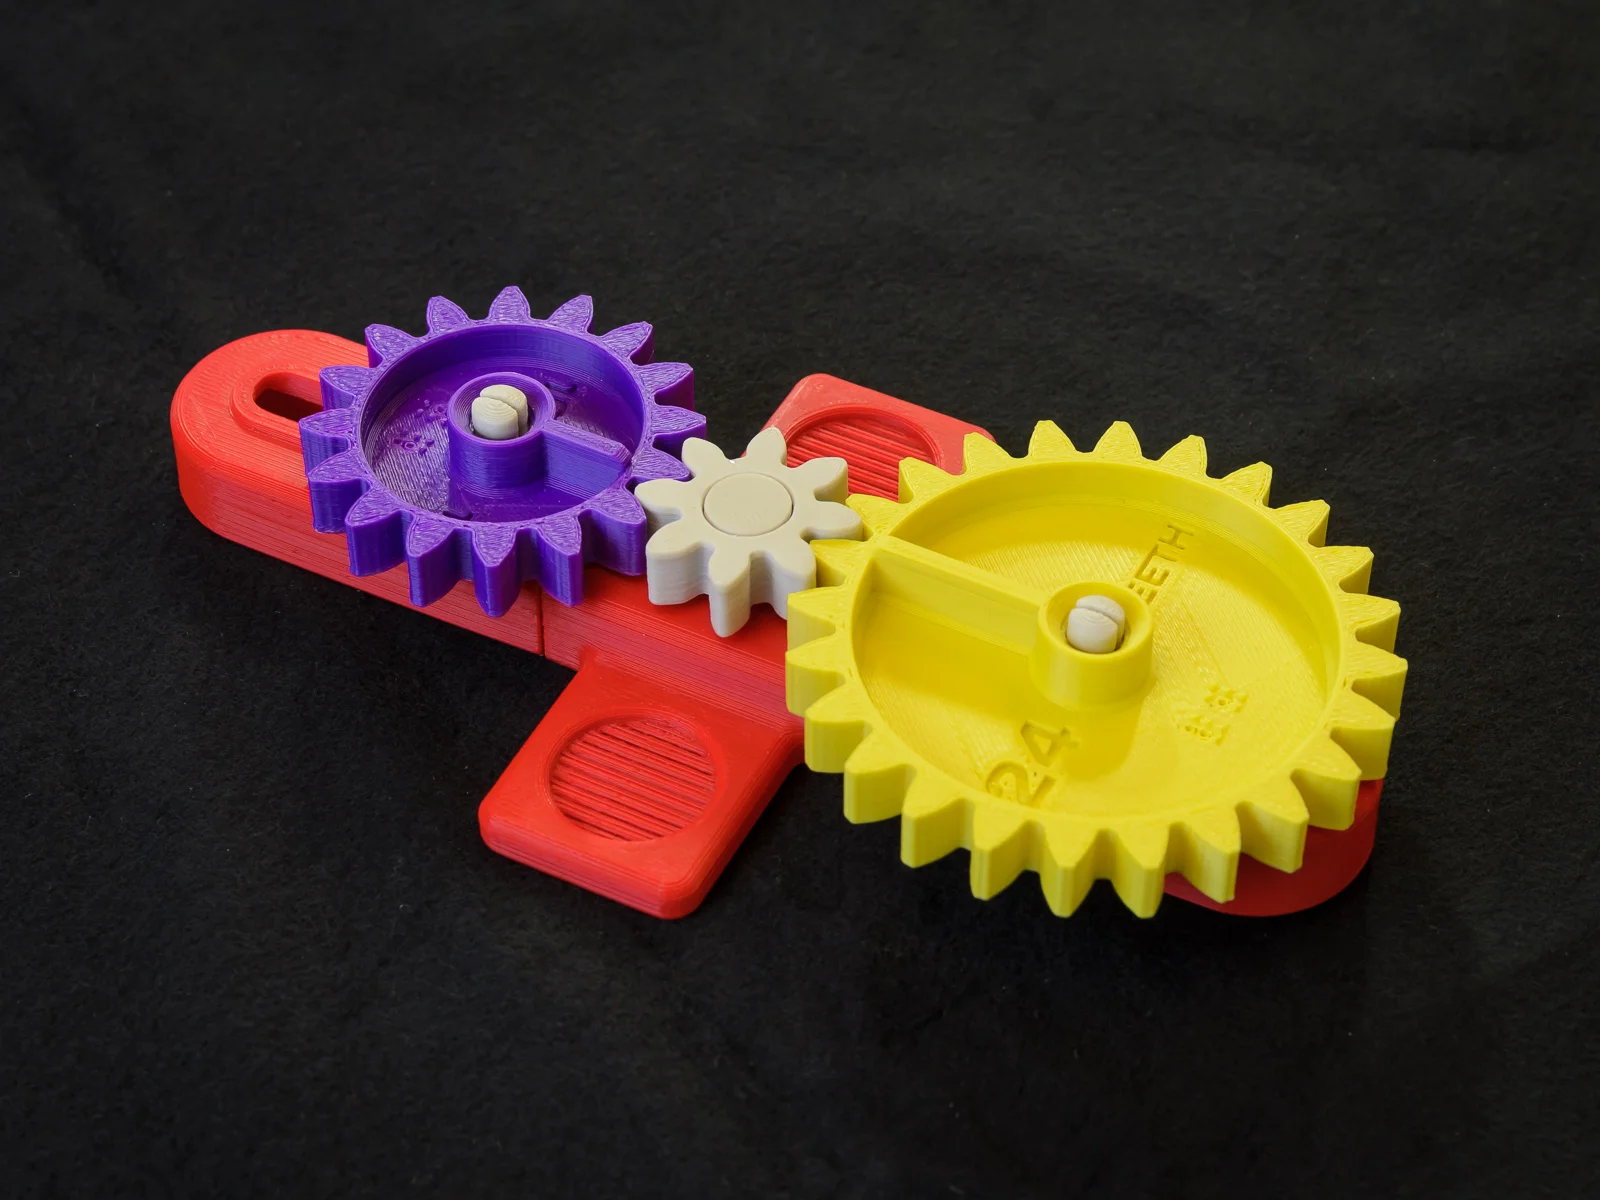
ALL gears have been revised. The changes make assembly easier with better fit and smoother operation. This Math manipulative is designed to be playful from the first touch. It lies flat on a desk top, so it will also work well with school overhead projection systems. Behind the mechanical fun there are several simple ratio exercises. The eight tooth "Idler" gear is supplied to add reverse rotation without affecting the ratios. Each interchangeable gear has built-in graphics to indicate the number of teeth as well as rotation position. The addition of braille numbers will help those with impaired vision. FYI, the "T" on the 16 tooth gear stands for "teeth". Some gear ratio formulas can be found here: https://en.wikipedia.org/wiki/Gear_train
This thing is designed to print on even the smallest machines. All parts fit within 105 mm x 105 mm build area. No support or raft is needed. There should be VERY little clean-up. Assembly is simple, just look at the photos provided. Rubber bands provide tension to keep the wheels engaged no matter what the combination. The rubber bands are just common 3/4" or 1" diameter office supplies. One part that may get a little tricky to print is the Idler gear. That part is really two parts in one. In my test, it just needed to be broken loose and spun around a few times to free it up. It can be added or taken out as desired. Be sure to clean out the center holes in the gears after printing so that it is not too difficult to snap them on and off of the pins.

Mini Twirl Mustache
This is one of those, just for fun kind of items.
This is a smaller (kid size) version of the popular "Twirl" mustache by gianteye, found on Thingiverse. This now prints as one piece. When printed the new contours look like hair. Just print and wear. You may want to smooth the nose-clip parts a little. Prints well raftless and at a diagonal.
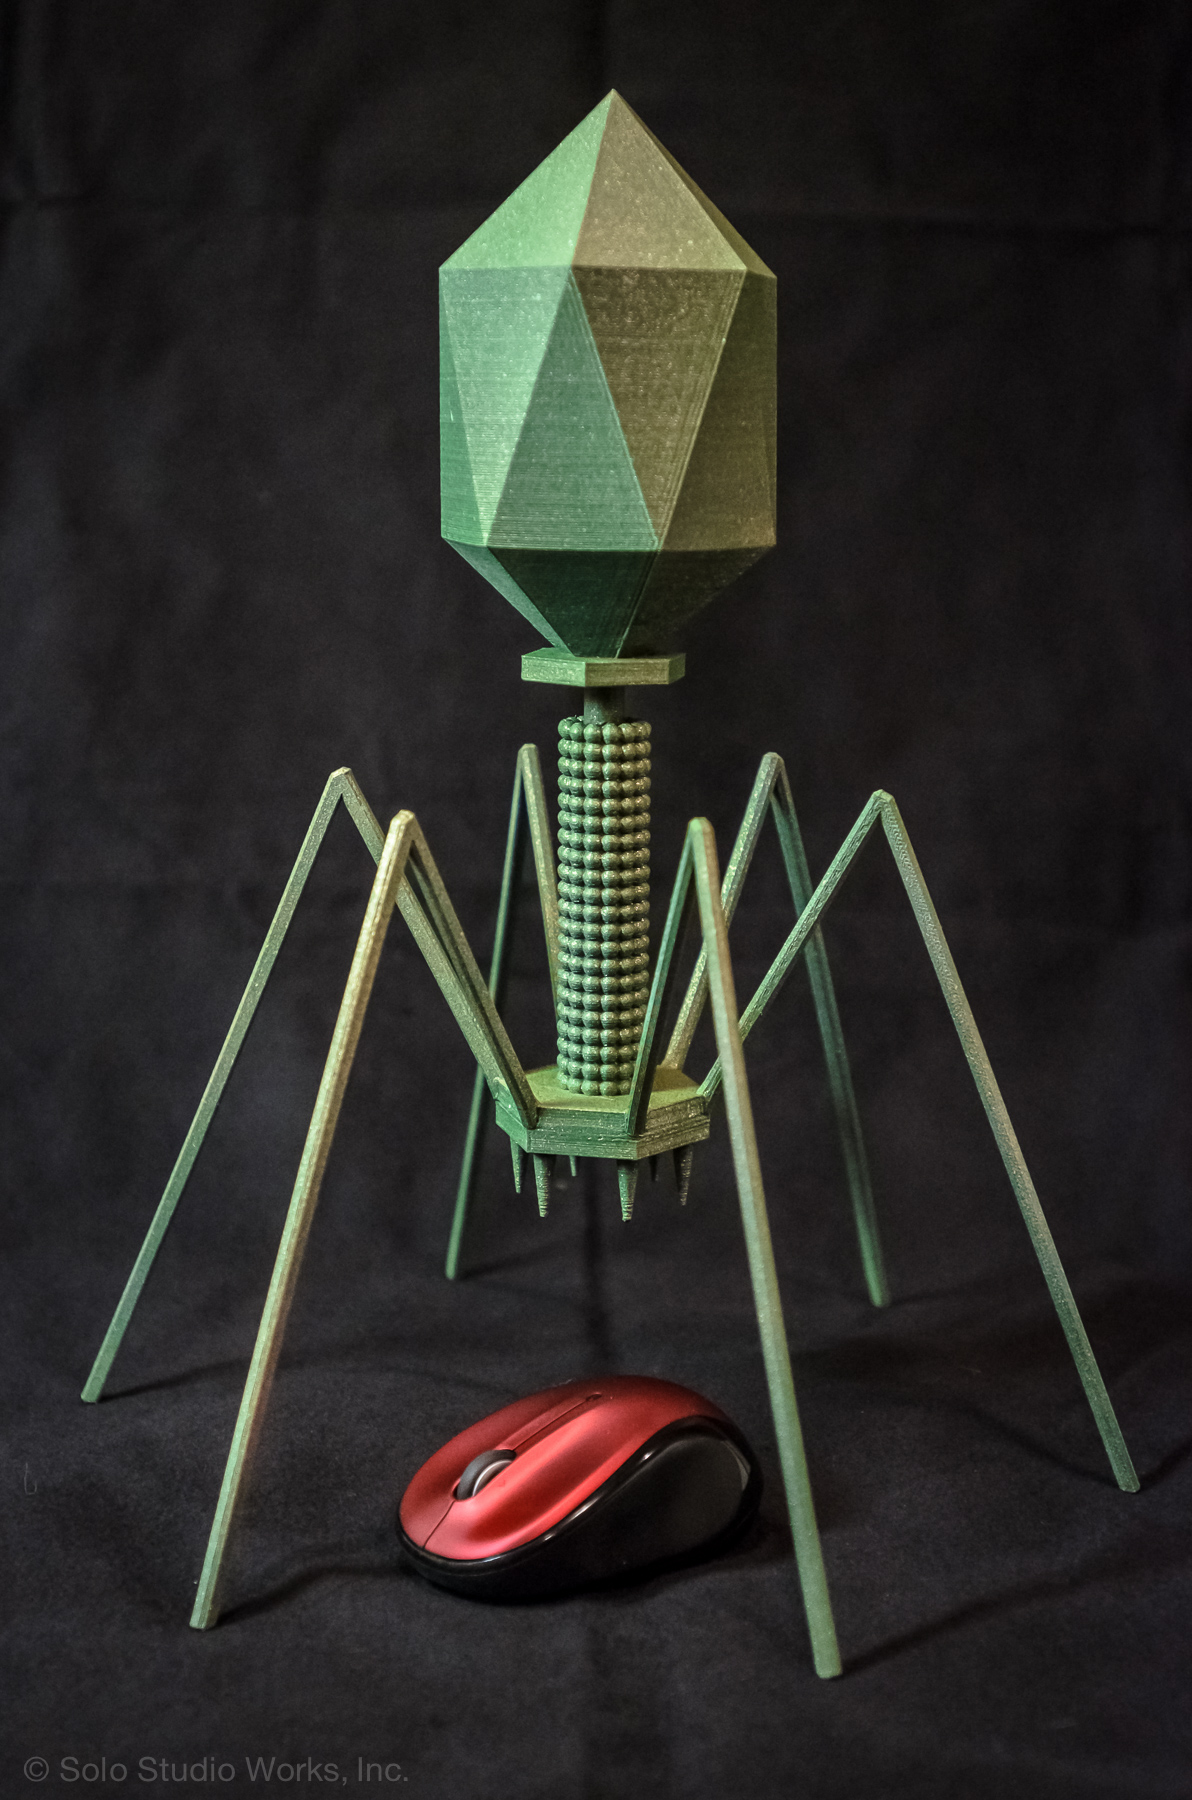
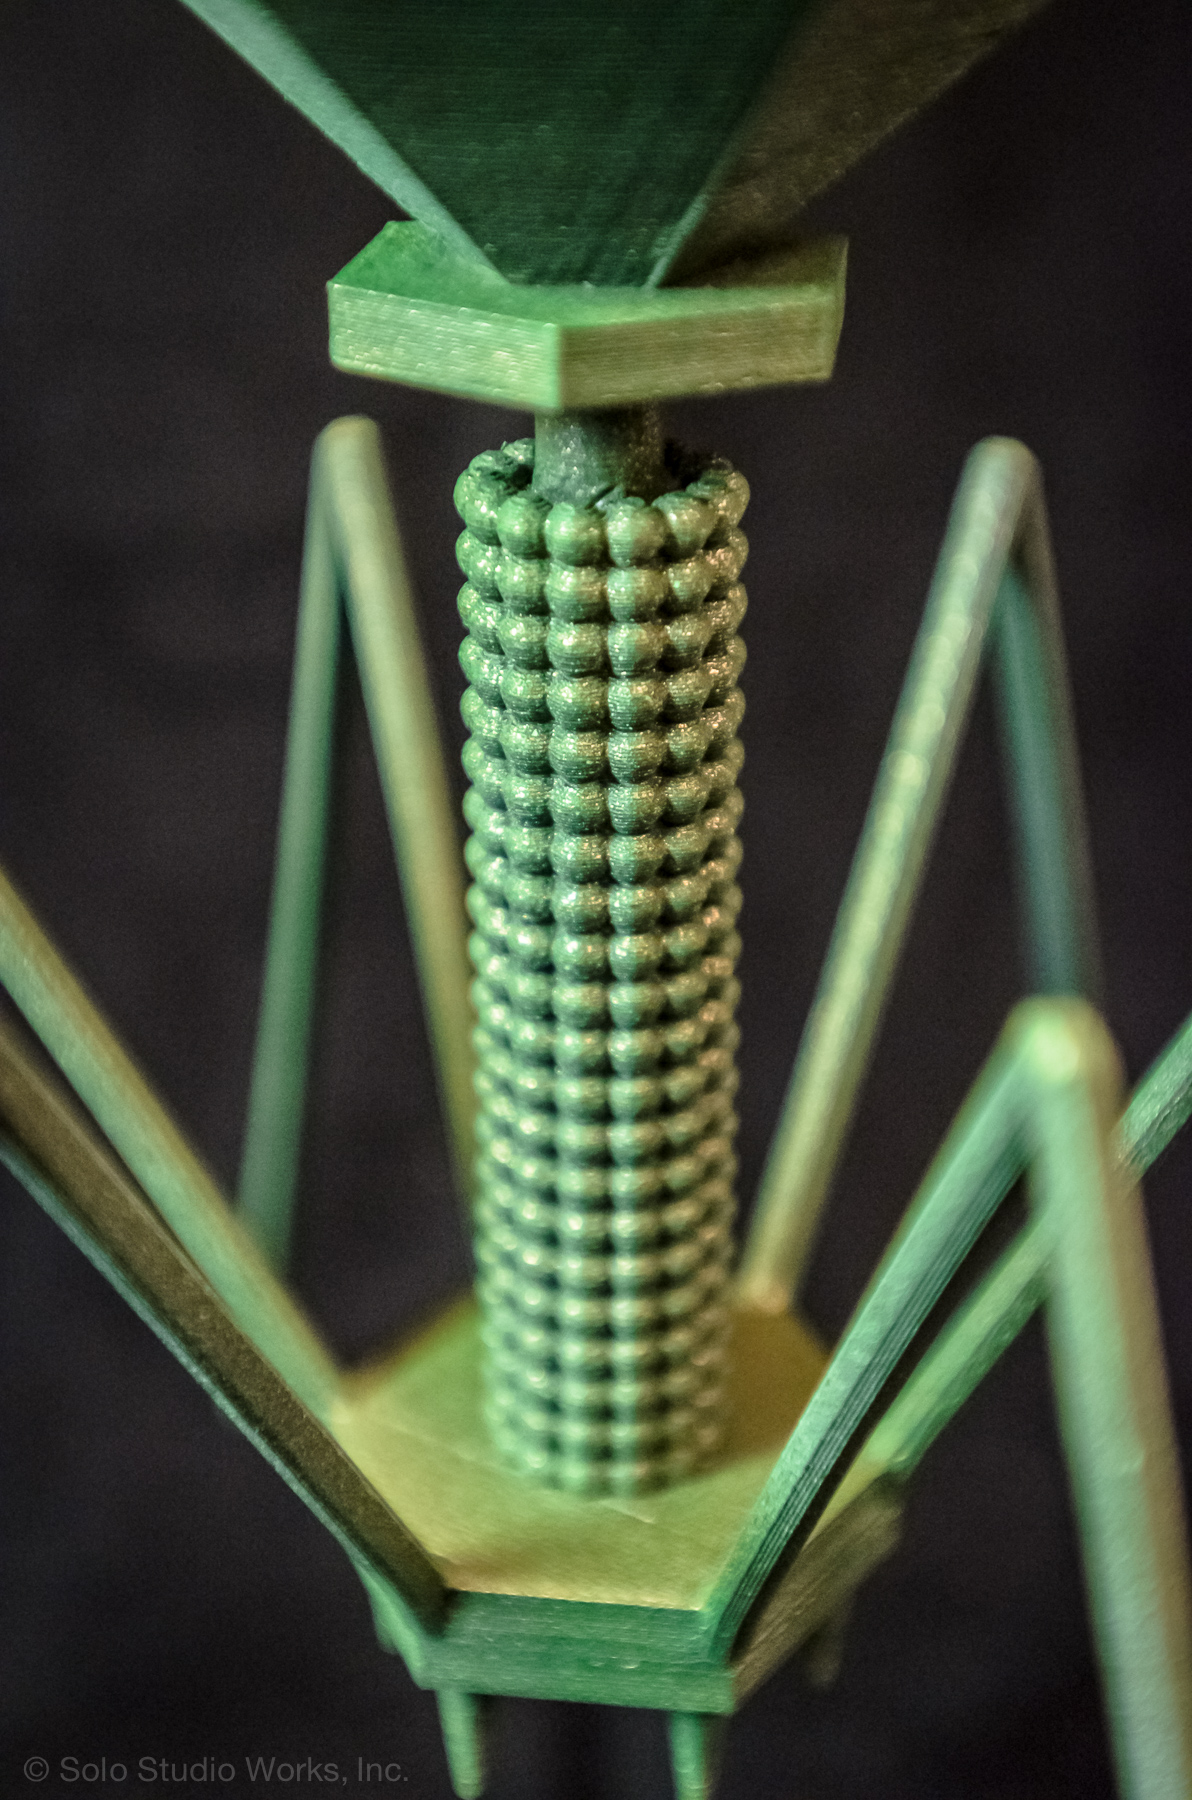
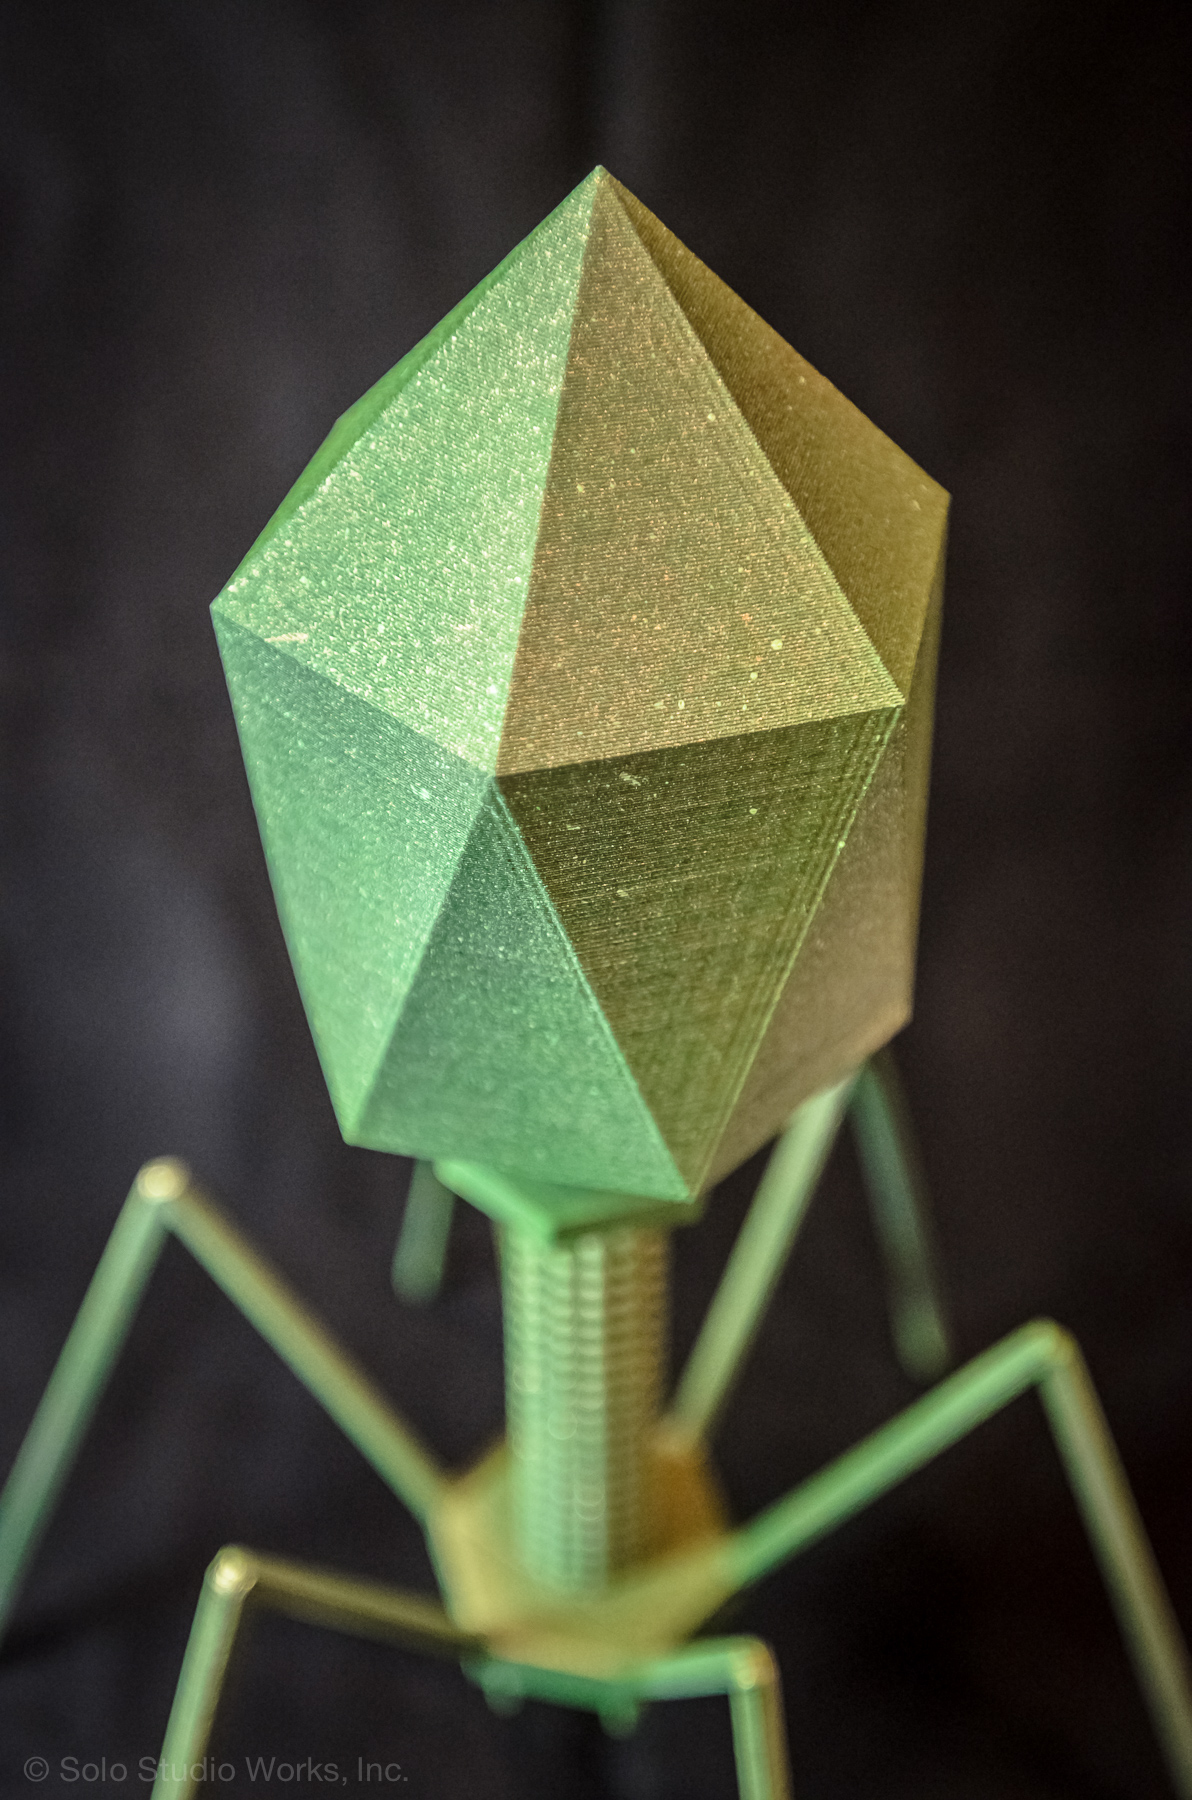
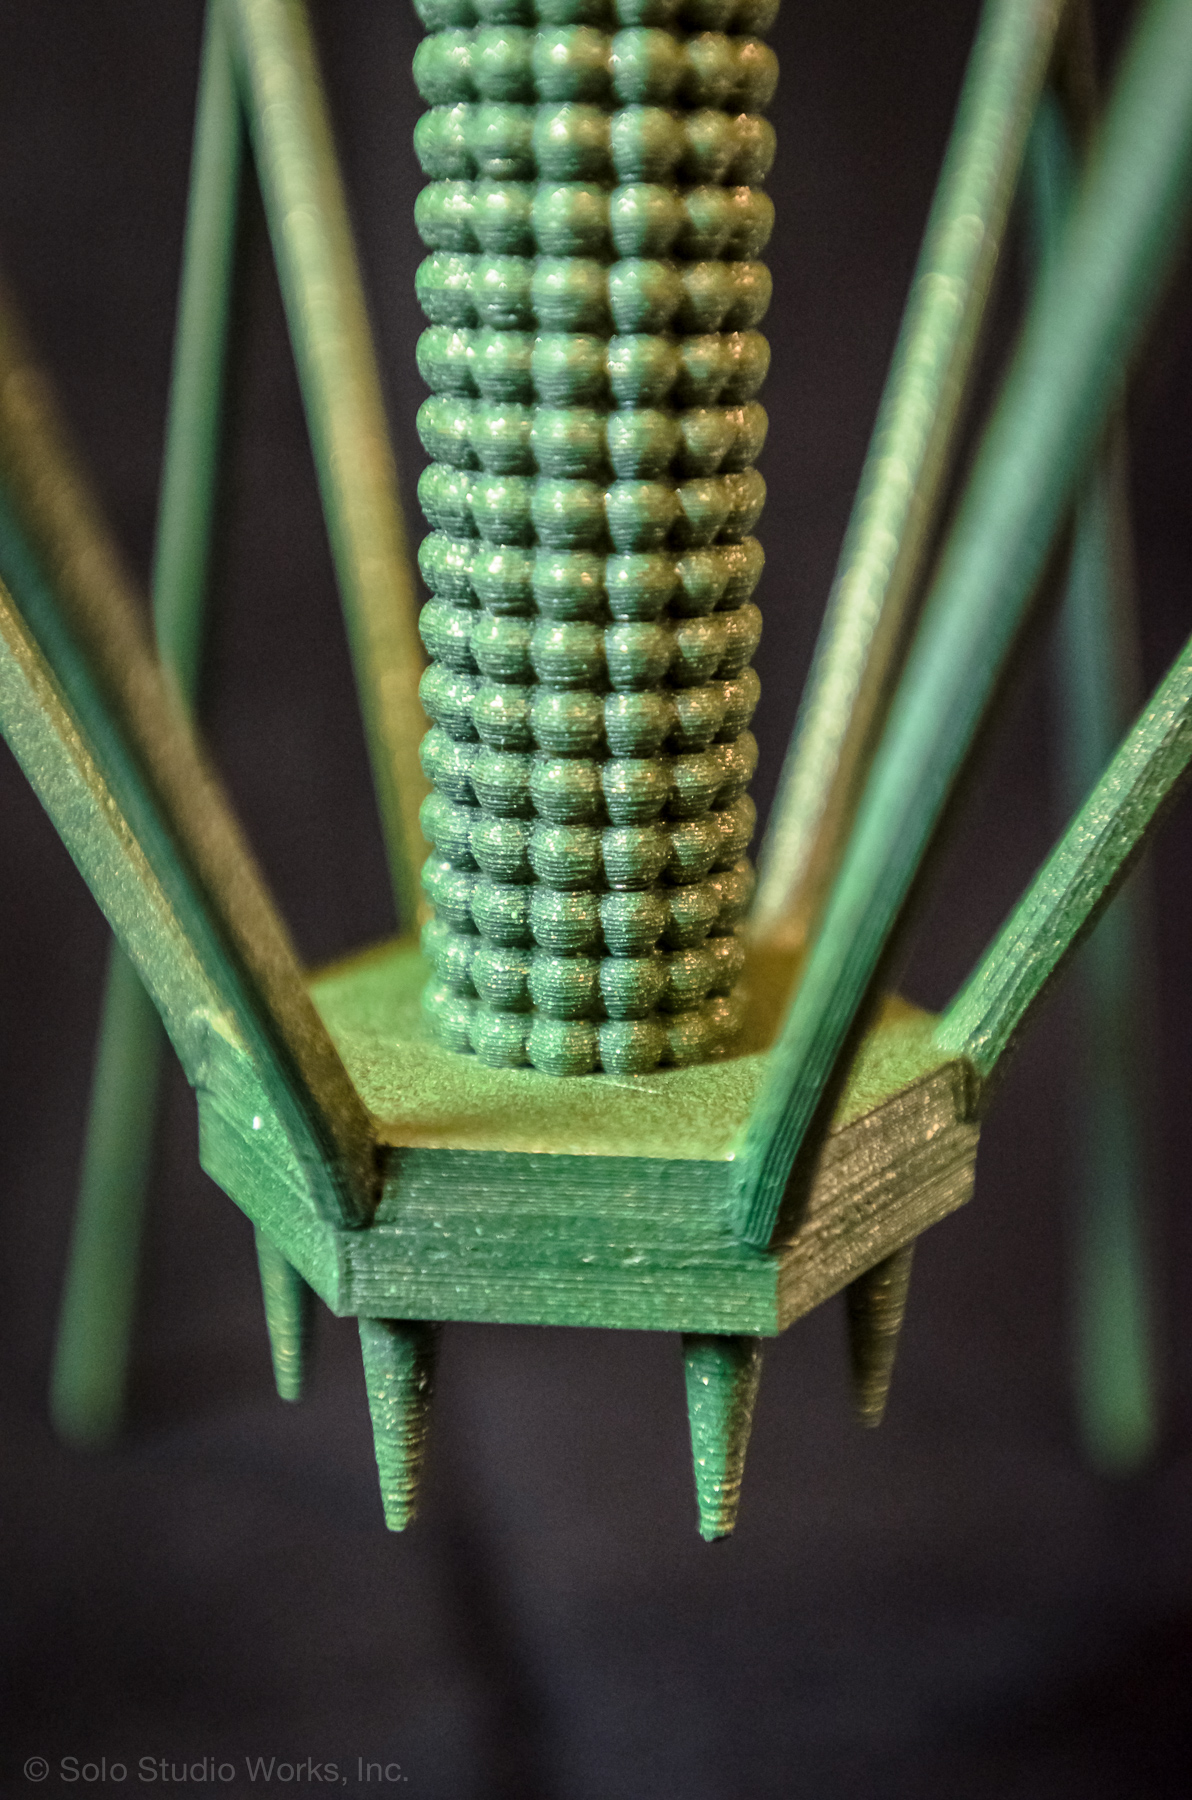
Bacteriophage
Bacteriophage - T4 Virus model. This design is based on a collection of images found while searching various internet sources. The print pictured was used for demonstration in a 10th grade biology class.
The model in these photos was setup in an "All parts file" to maximize print size. It is 250% larger than the individual part files. You can see how big it is compared to the computer mouse in the photo. Make yours as big as you like!
Nothing special about the print setup. No rafts or support needed. Overhangs are pushing the limits, but the use of a cooling fan helps. Glue parts together with super glue or ABS cement. Paint whatever color you like.
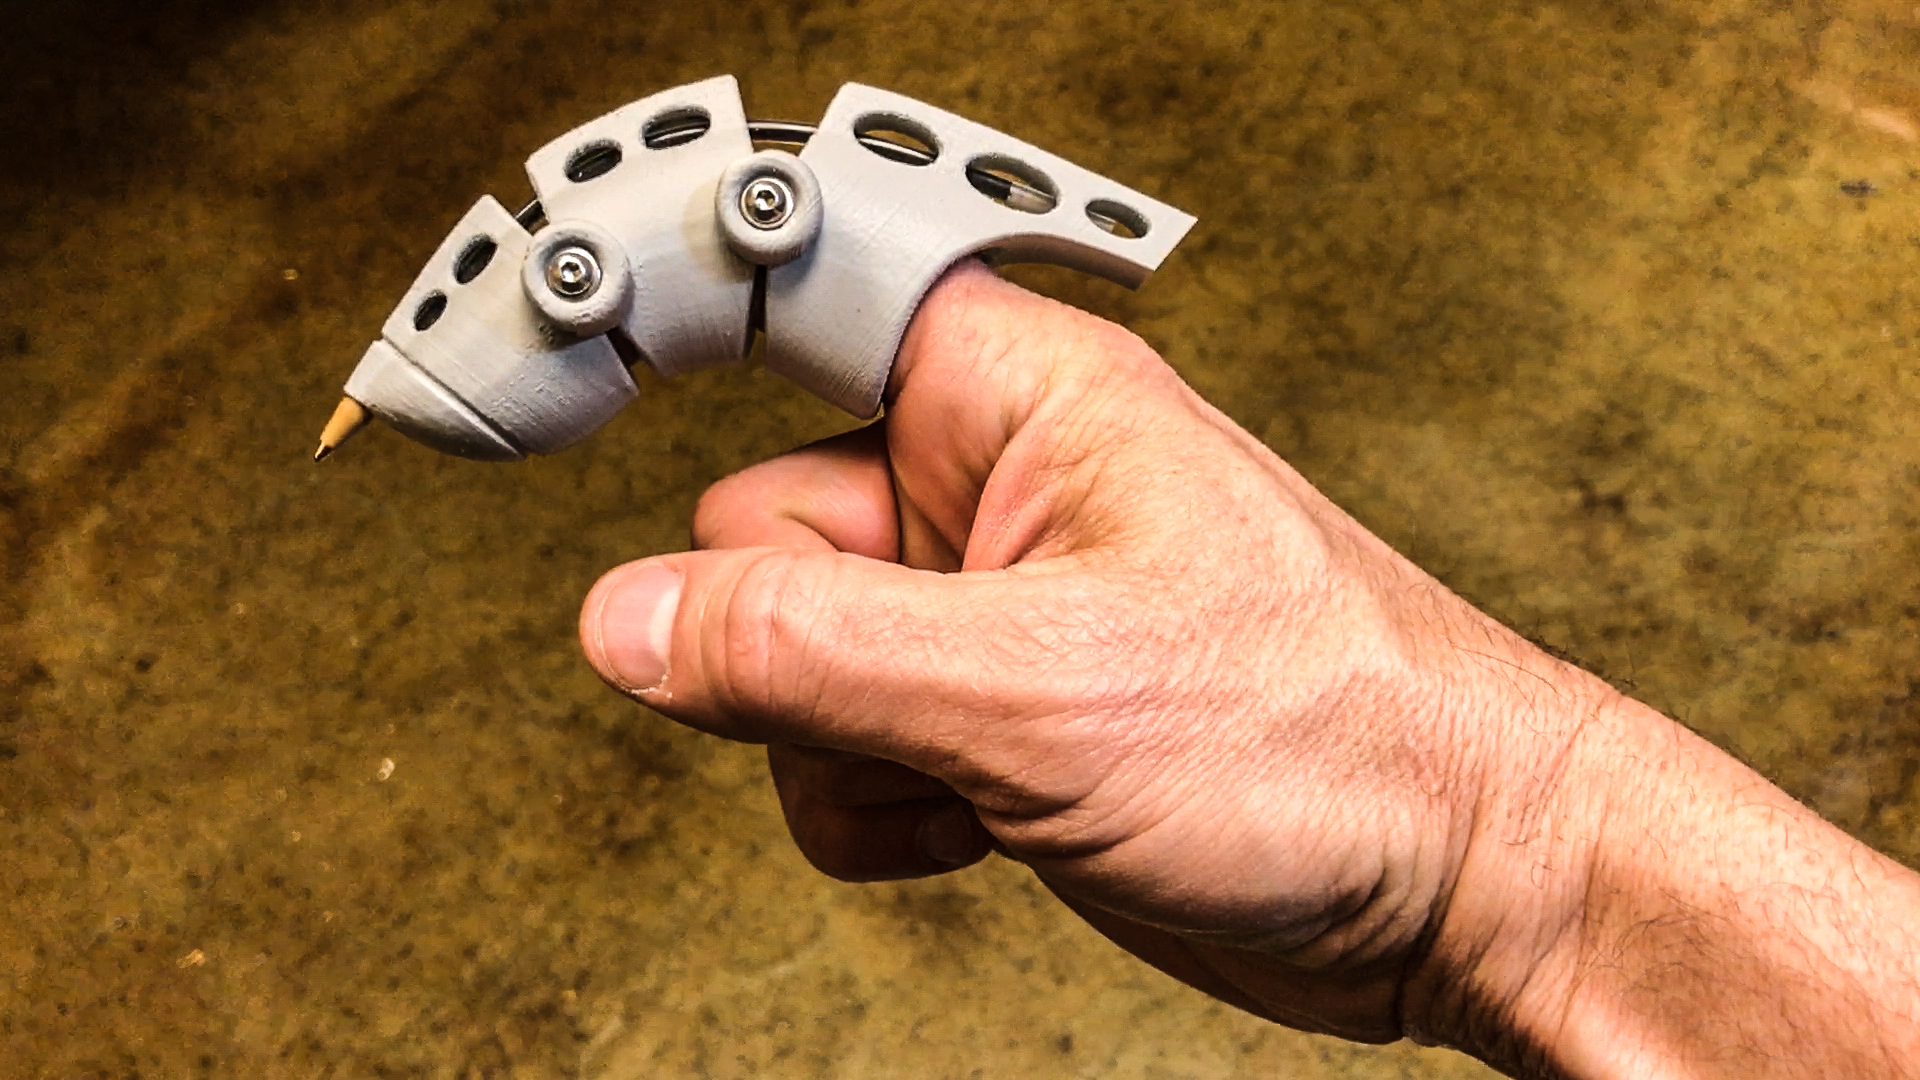
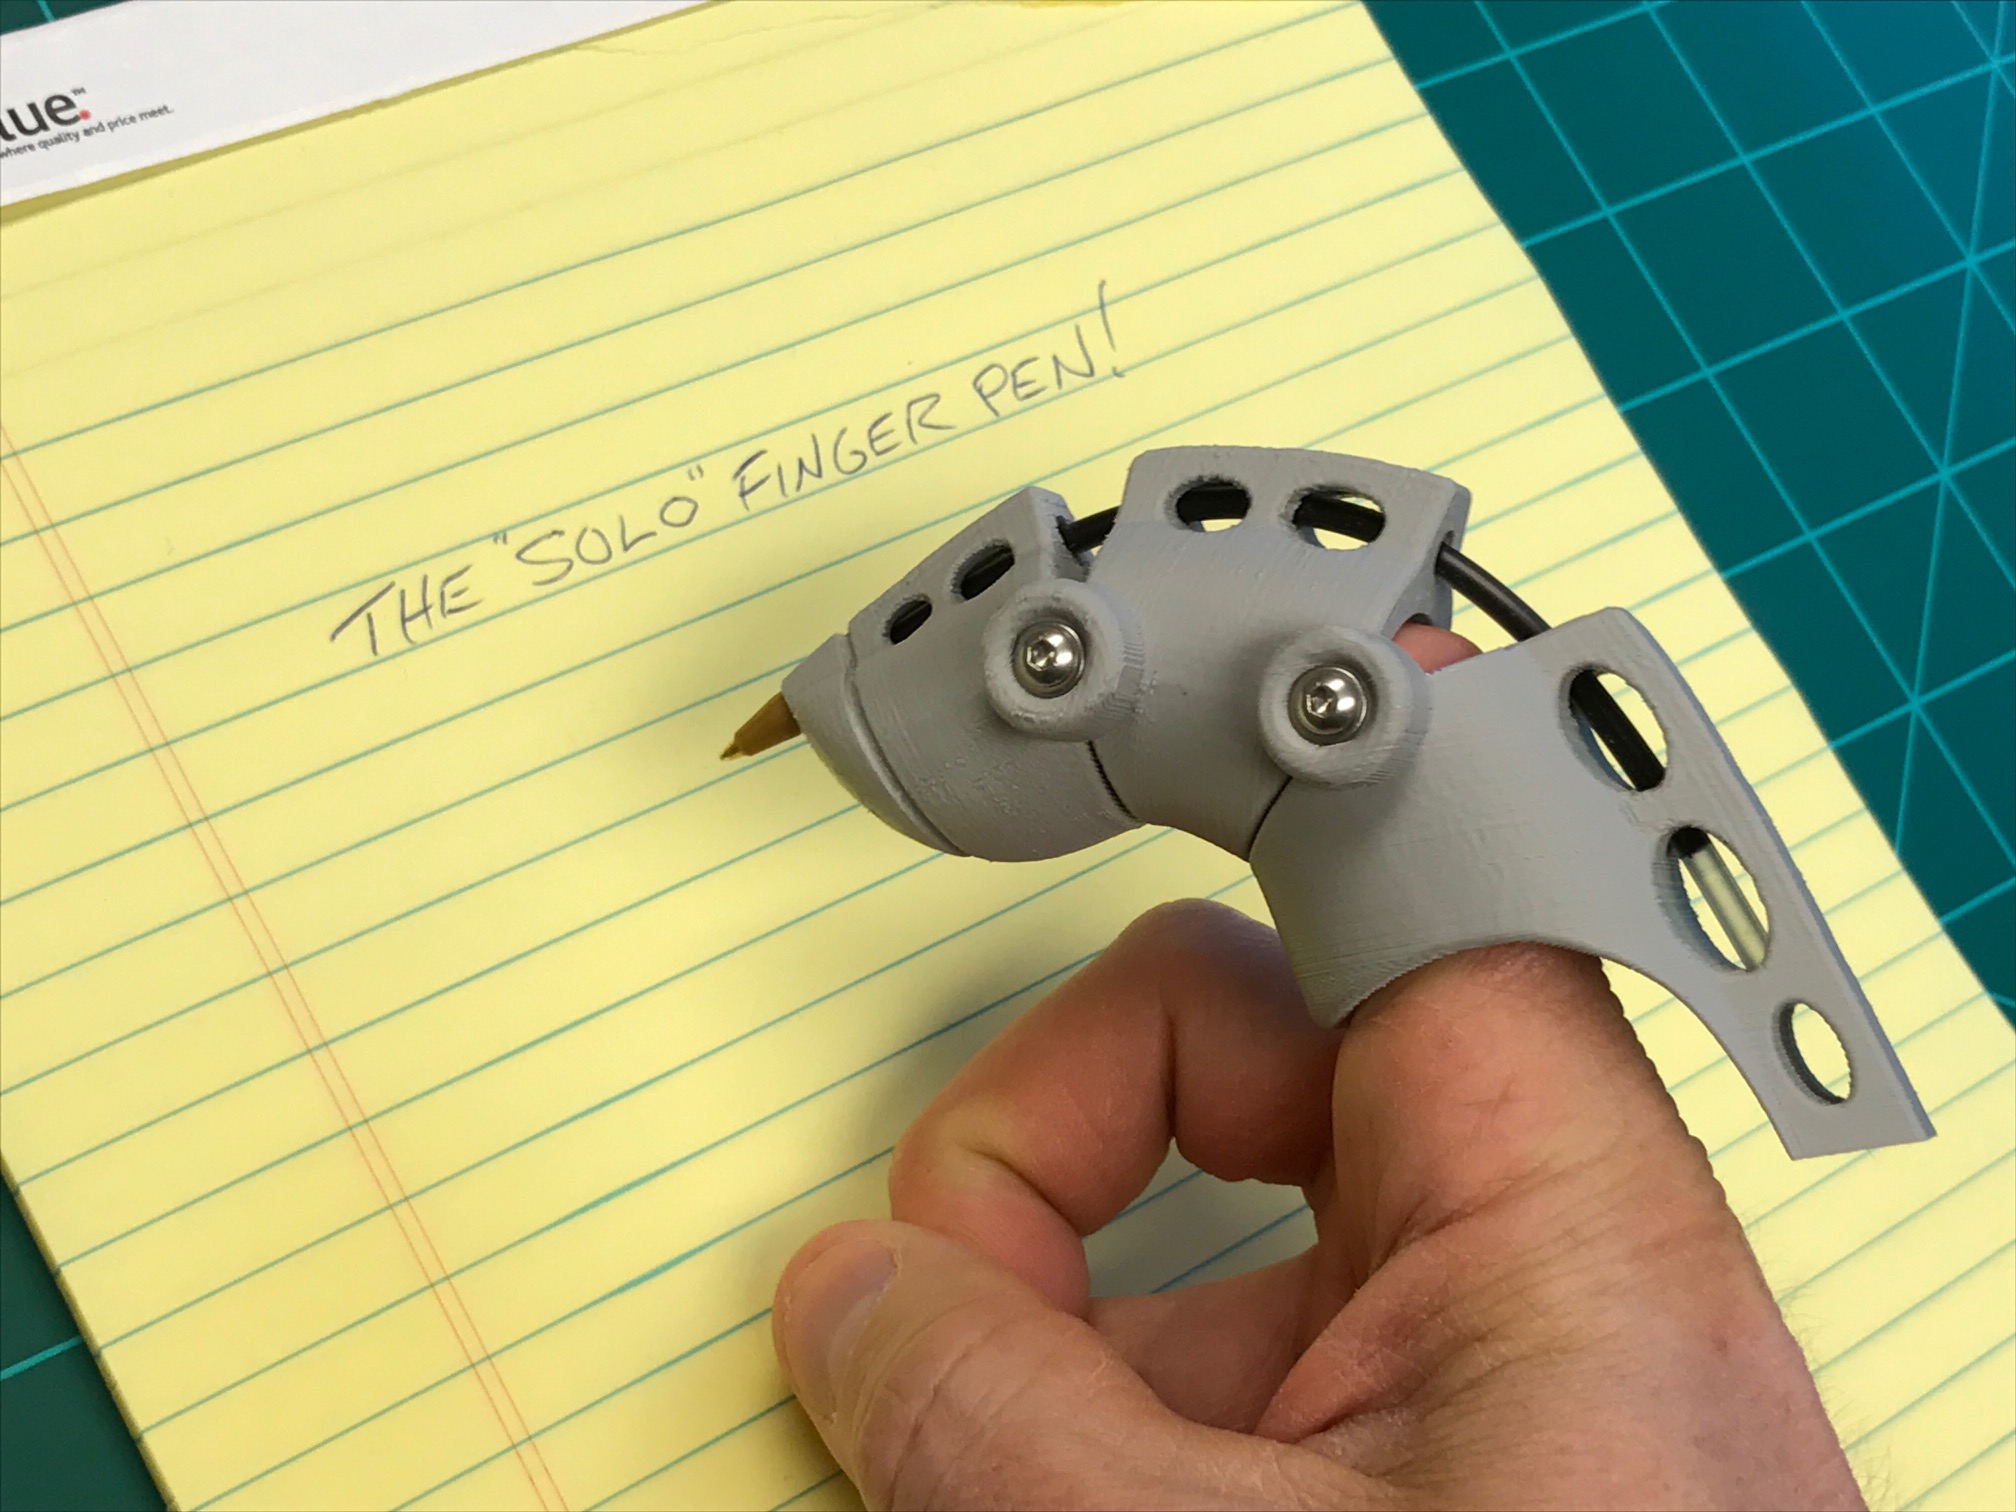
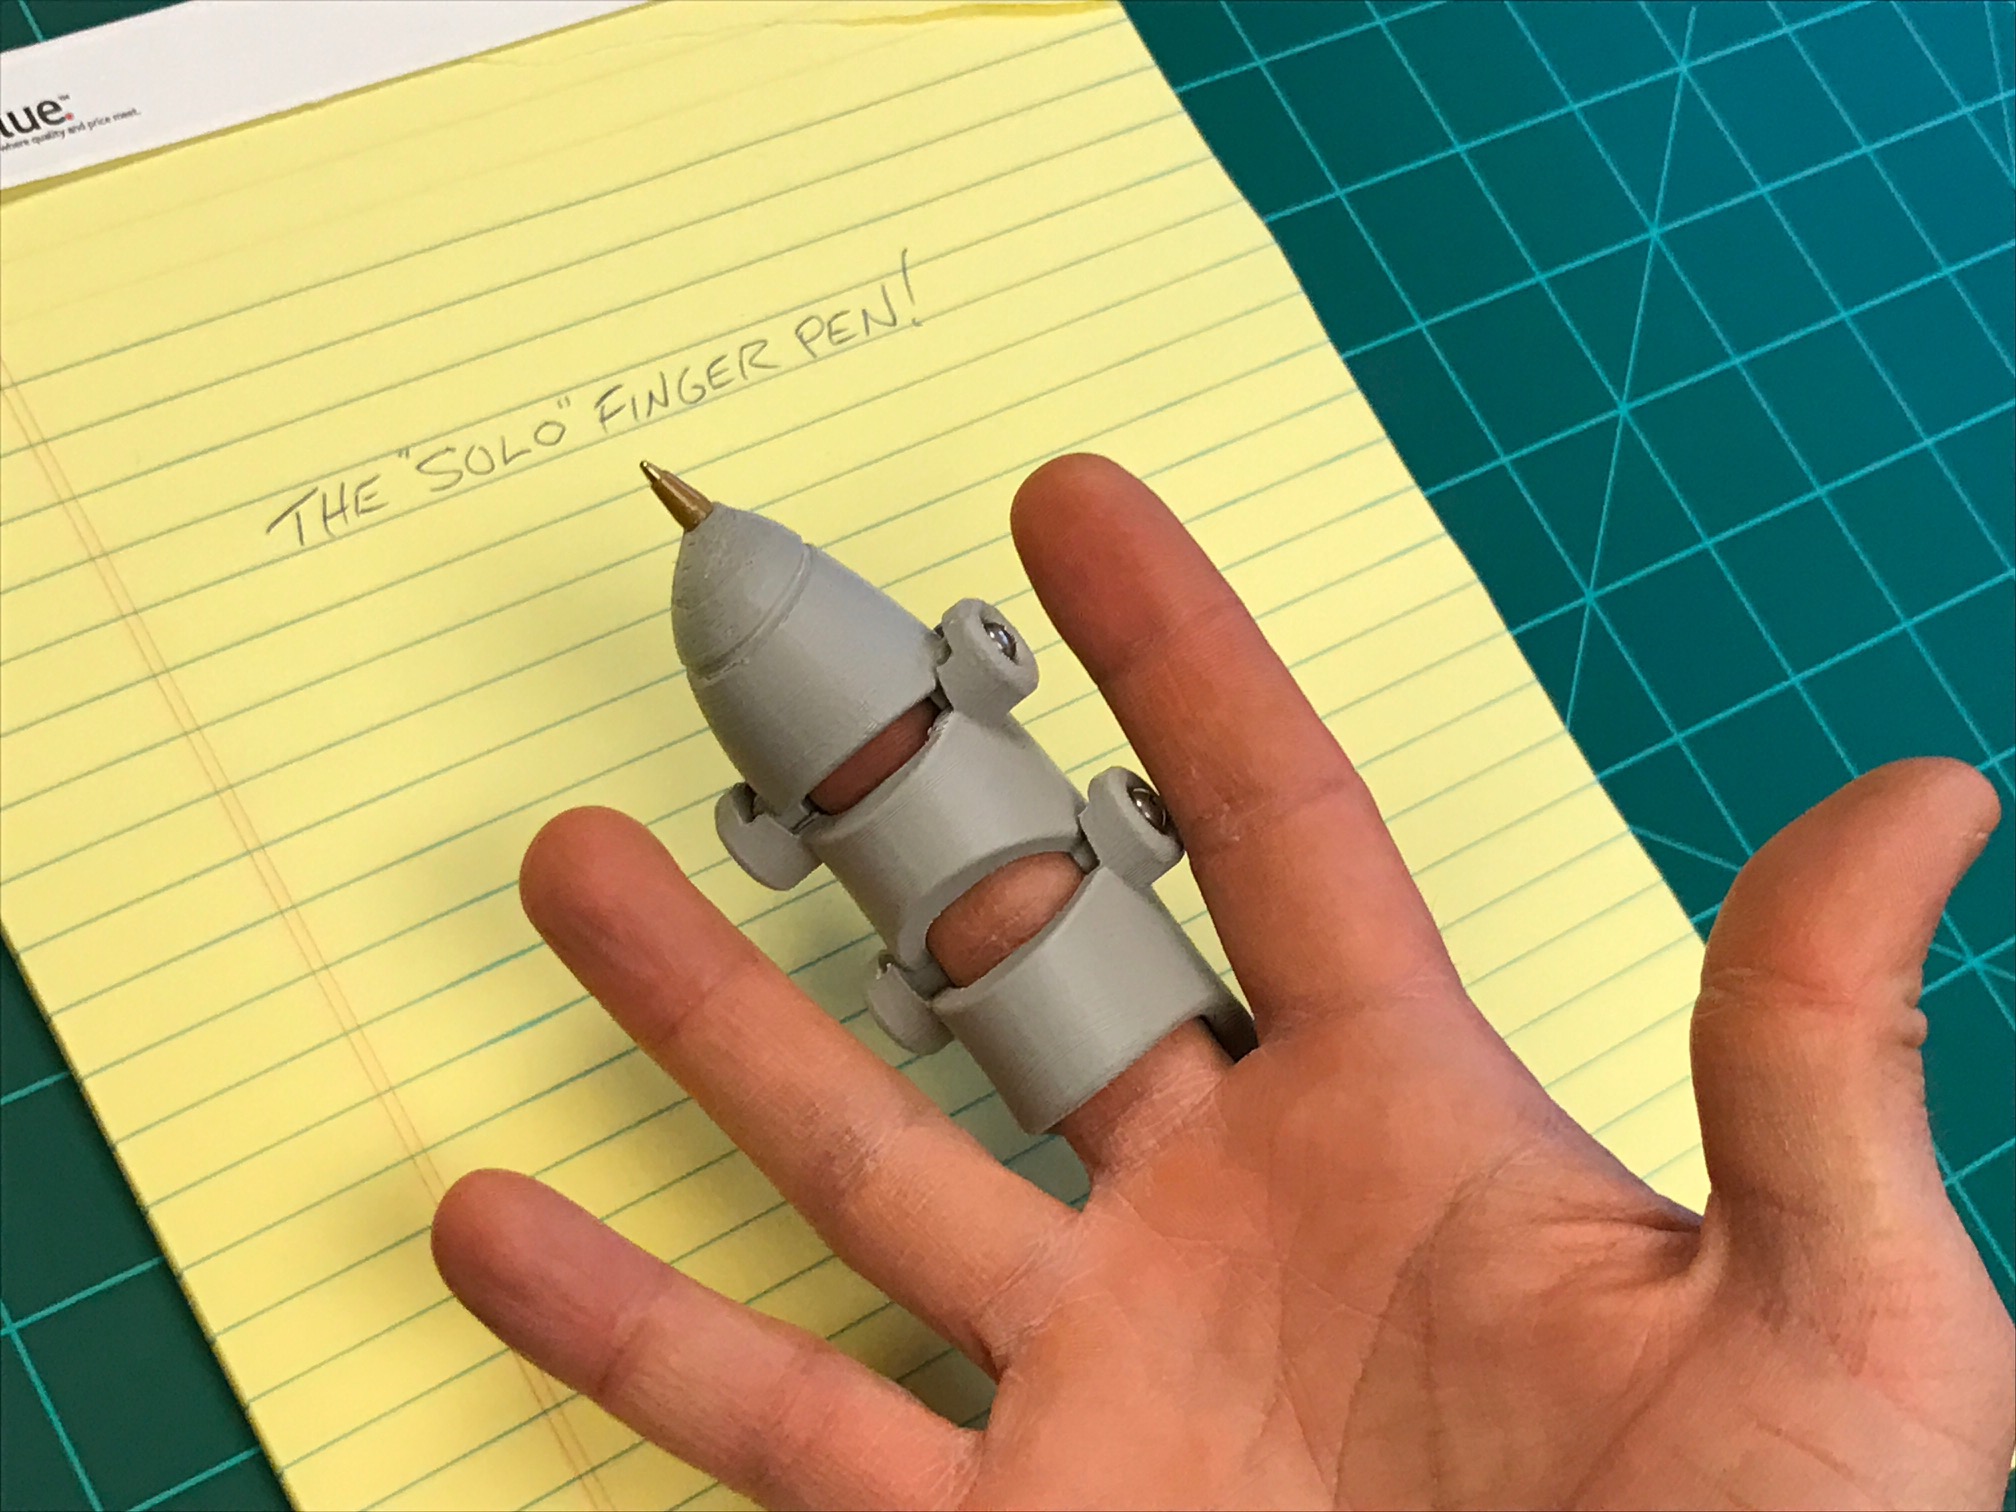
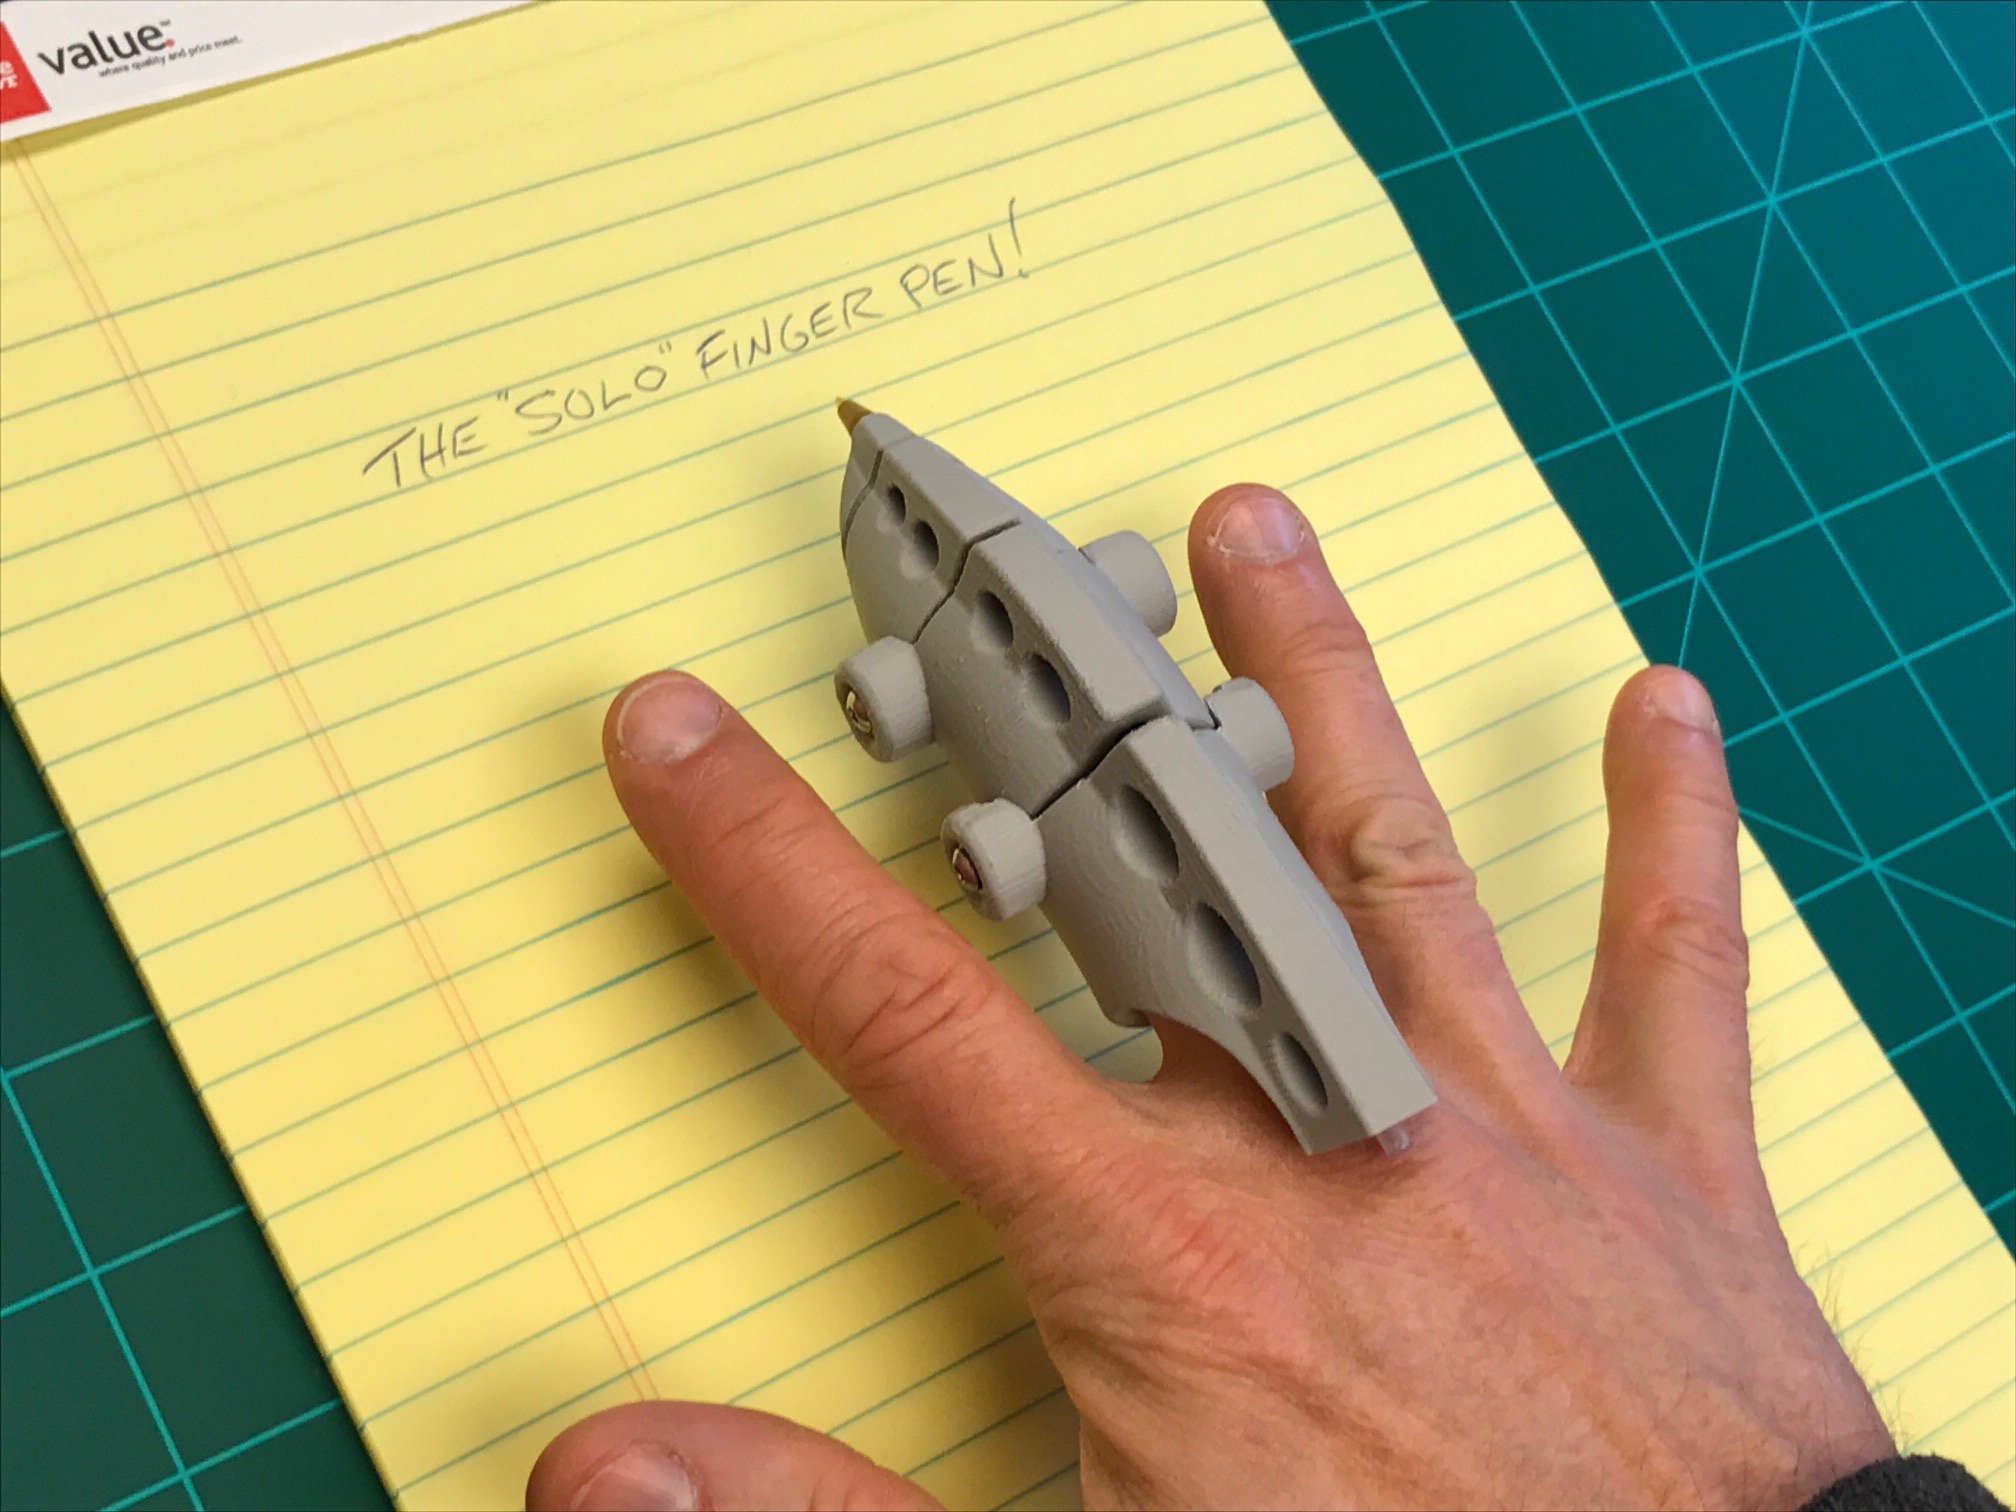
Solo Finger Pen
This mechanical finger can be a lot of fun to play with, but can possibly serve as prosthetic for someone missing a thumb or other fingers. Additional hardware parts needed: a basic flexible "BIC" pen insert. Four (4) M3 x 10mm screws with washers. Other small screws may be substituted.
Support is a must for this print. I have positioned the model sections at an angle that has worked well for me. I recommend 3 shells for wall thickness and 20% infill. Some clean up will be needed, depending on the type of support used.
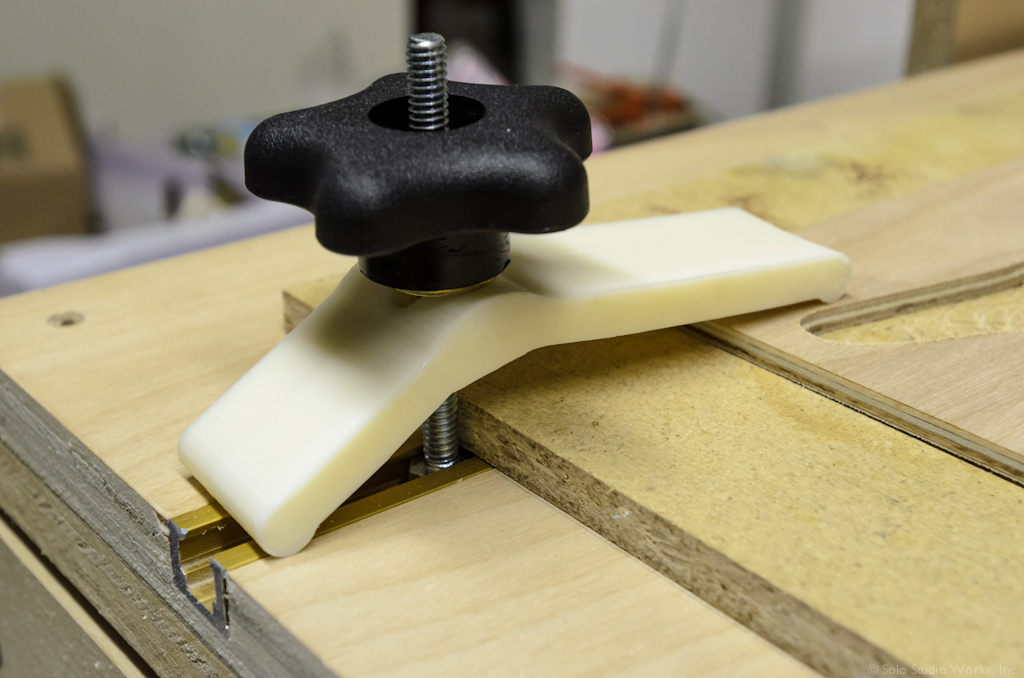
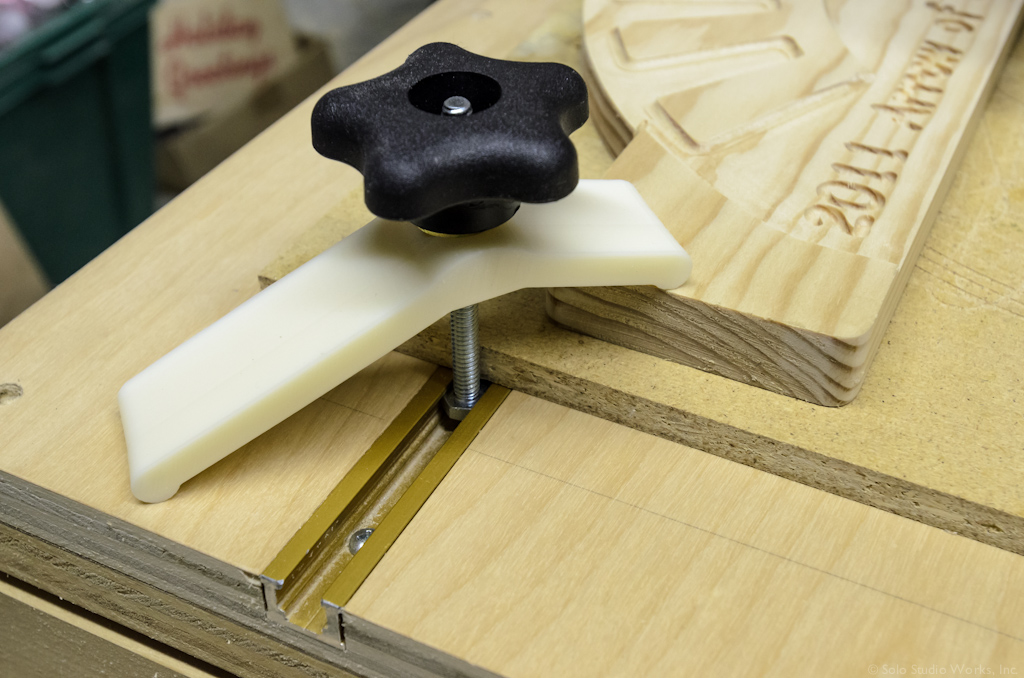
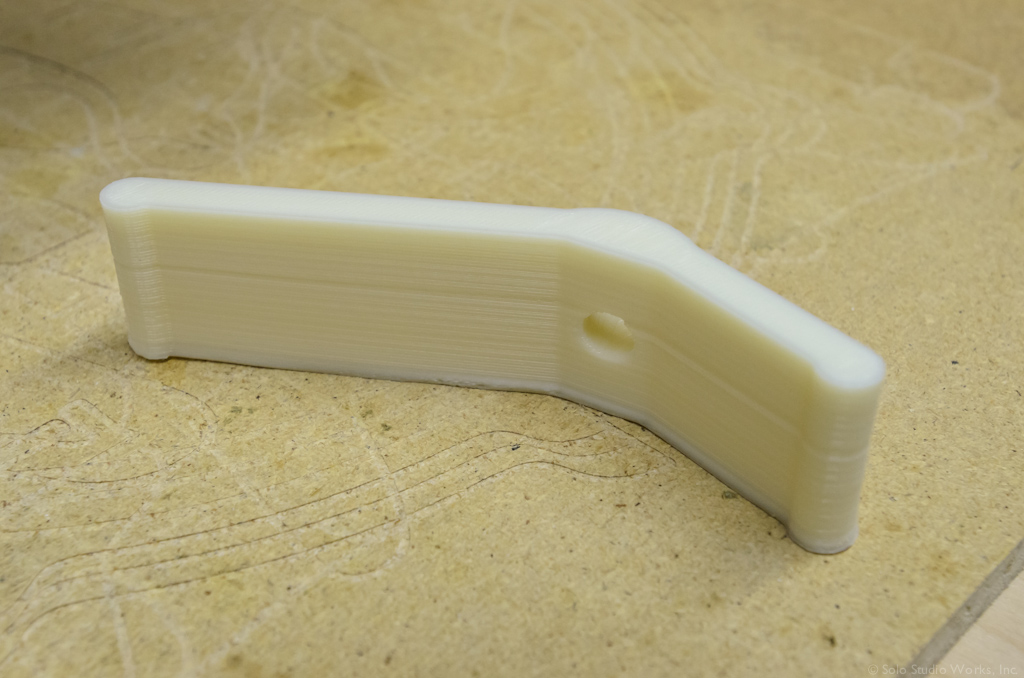
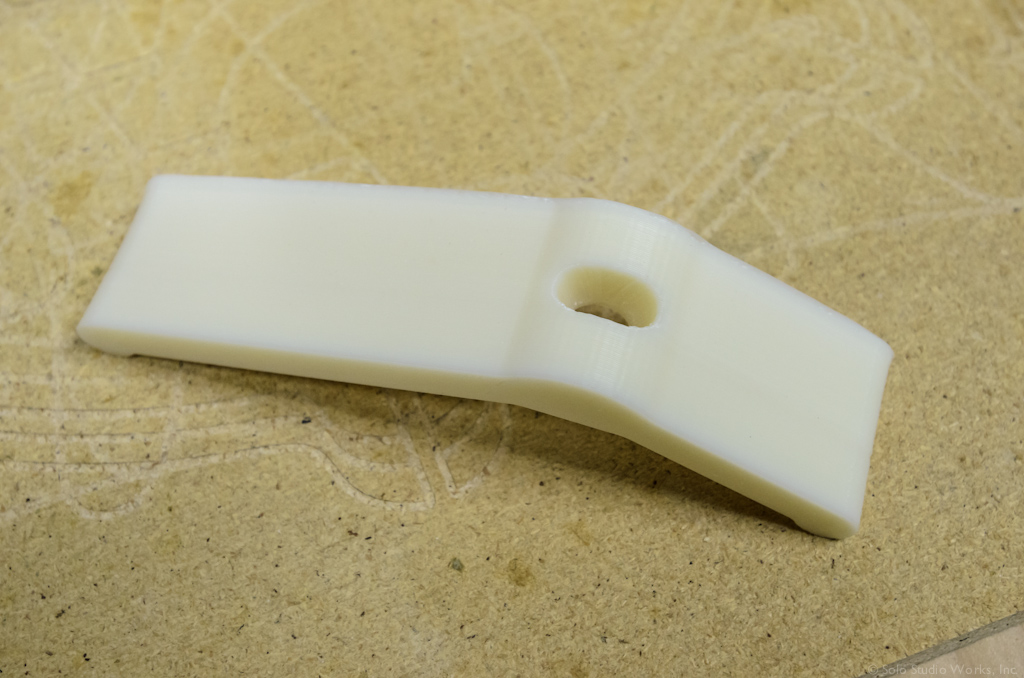
Work Hold-Down
This is a reversable hold-down clamp used on work surfaces with t-slots. Use with thin work pieces one way, or flip around to fit thicker stock. This design is based on a collection of different clamps I've seen while browsing woodworking tool retailers.
NOTE: The model download also includes a knob (not the one pictured). It has a hexagonal relief designed for a 1/4"-20 nut to press-fit in. Be sure to add a washer between the plastic parts as shown above. The knob in the pictures is store bought (already had them). The printable knob contained in the download is my own design.
I printed mine with 3 shells and 50% fill. They seem to be holding up good so far. This is designed to work with 1/4" - 20 bolts. 3" long works well, but use whatever length fits your situation.
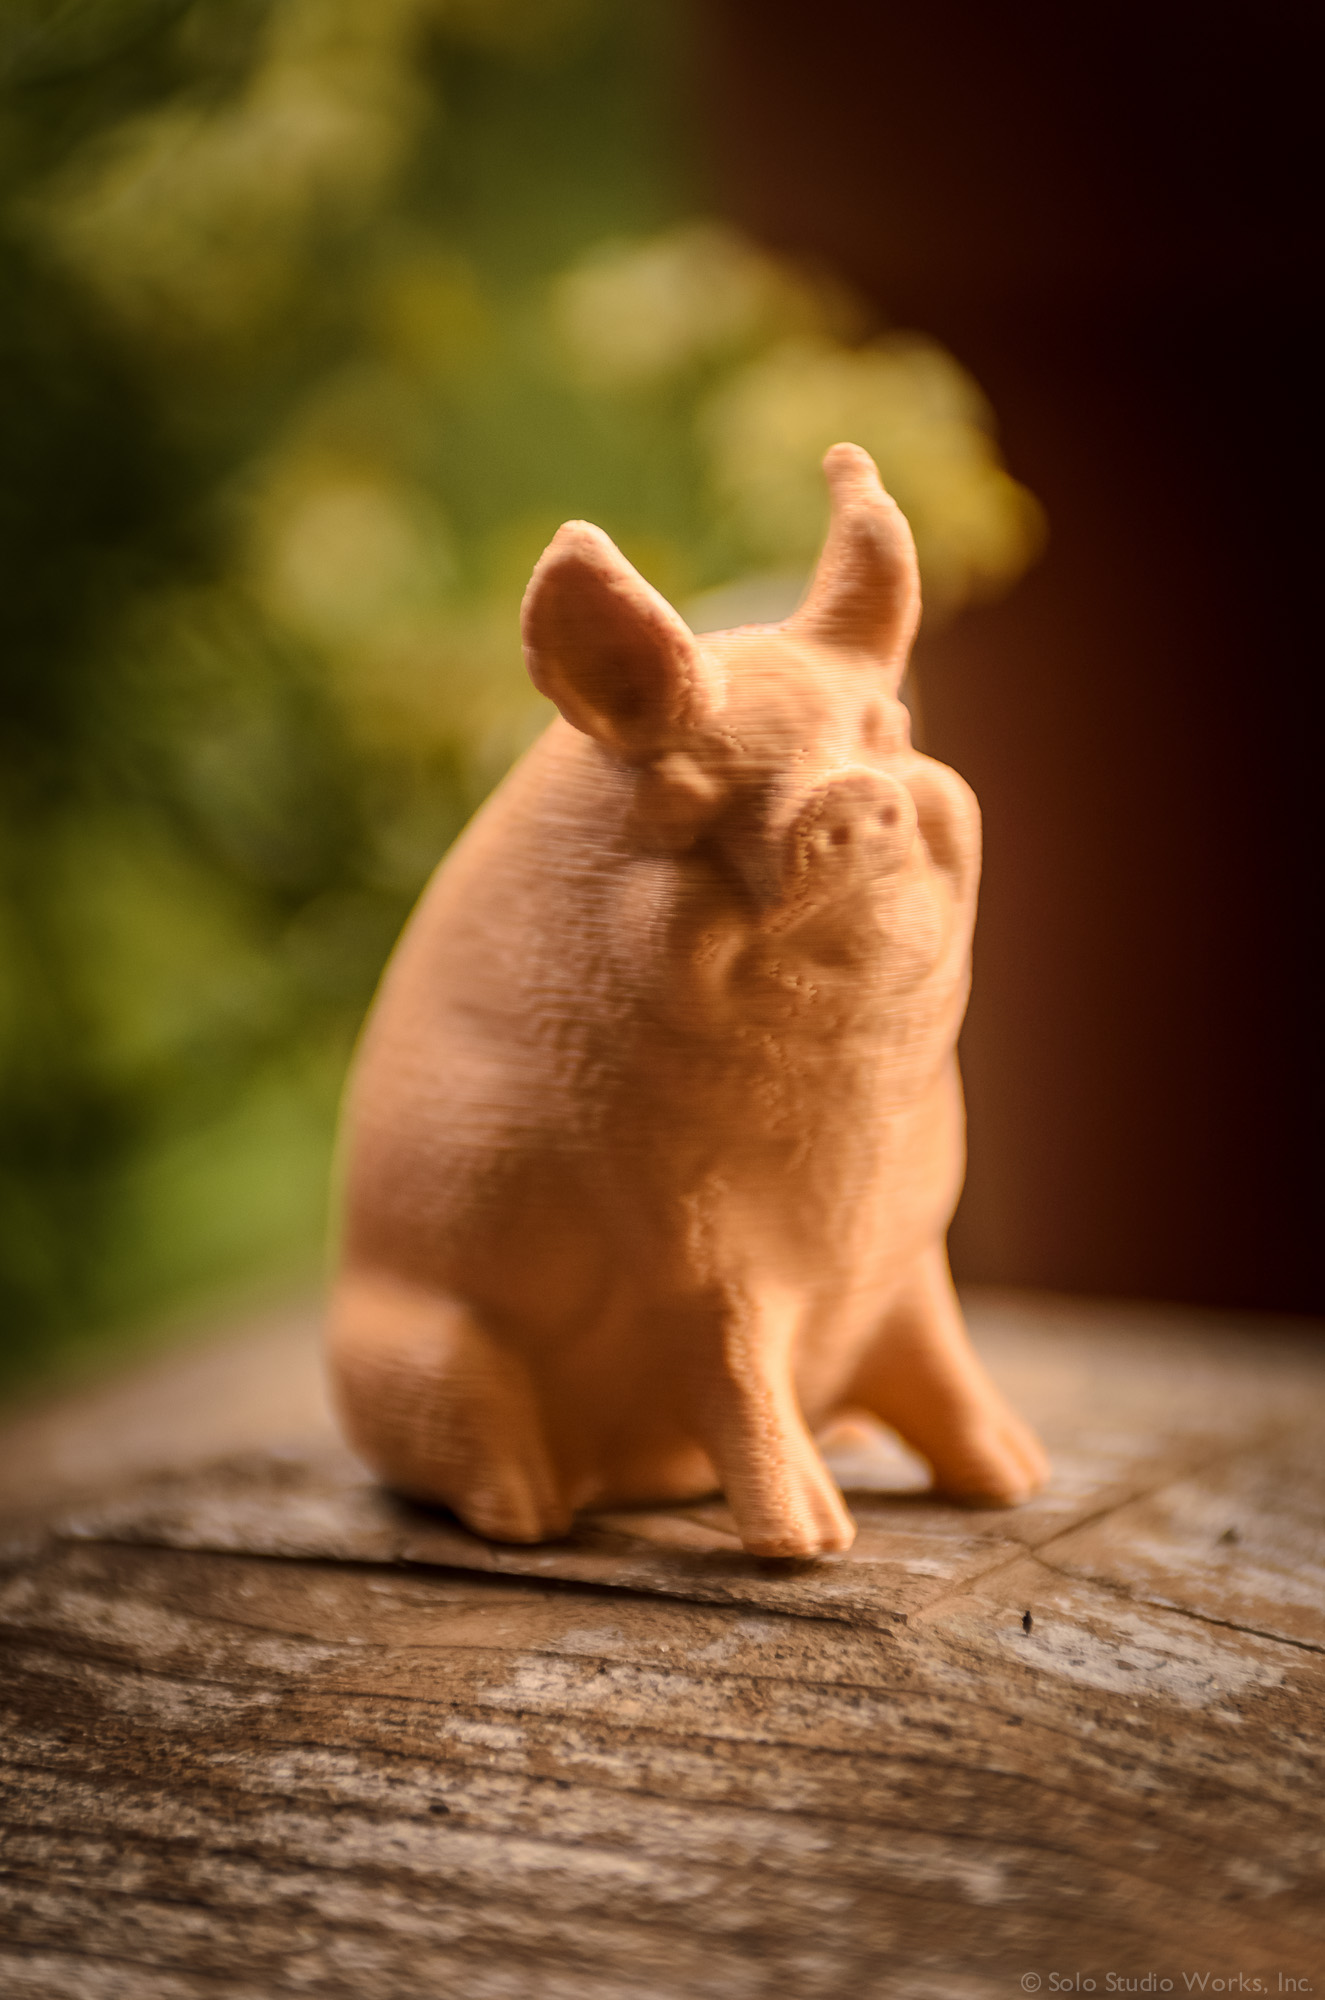
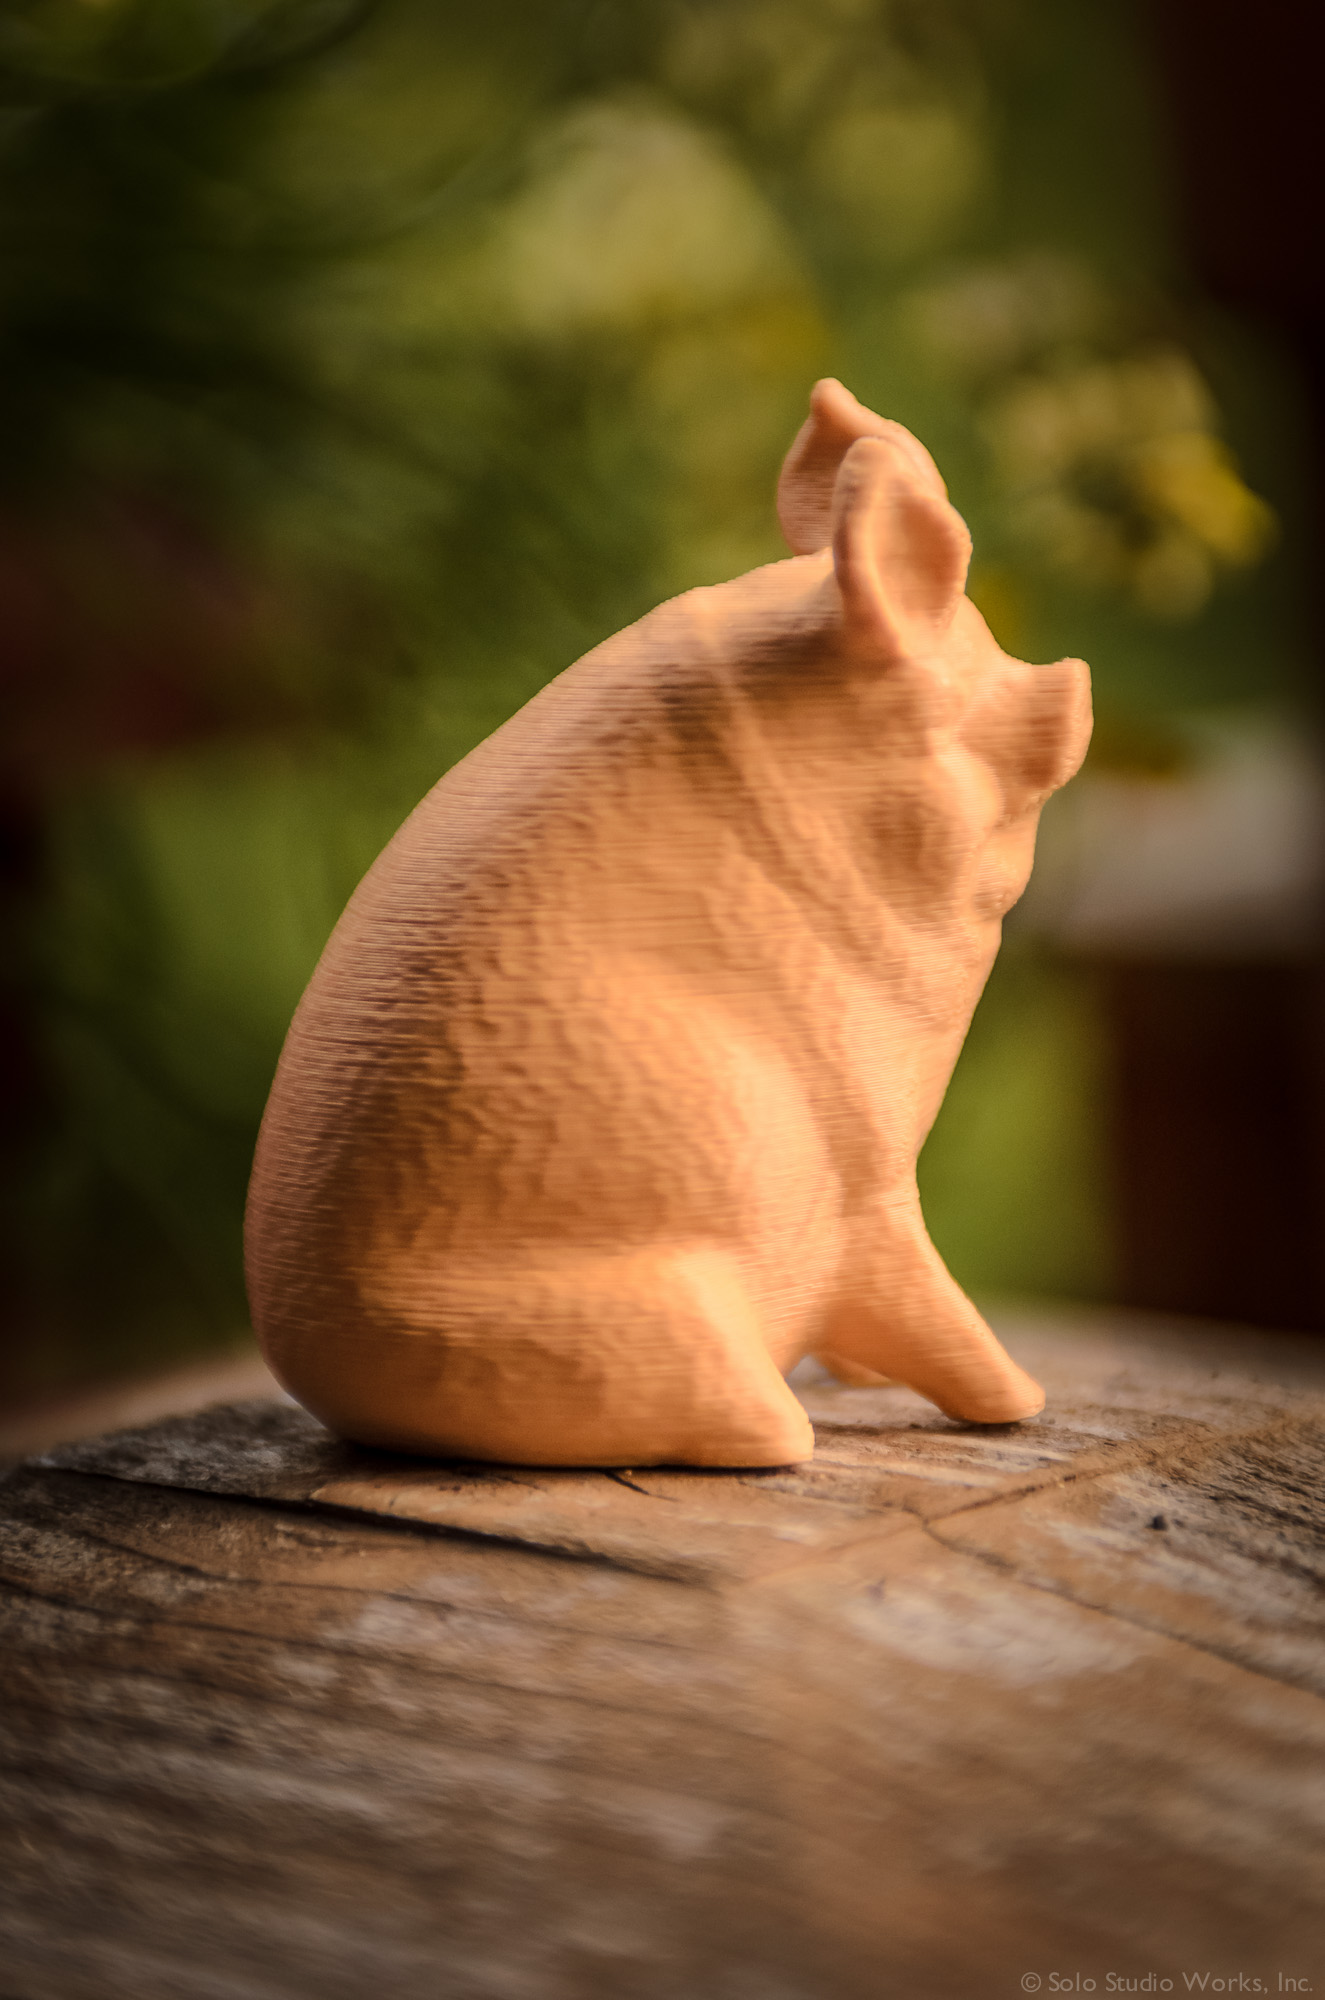
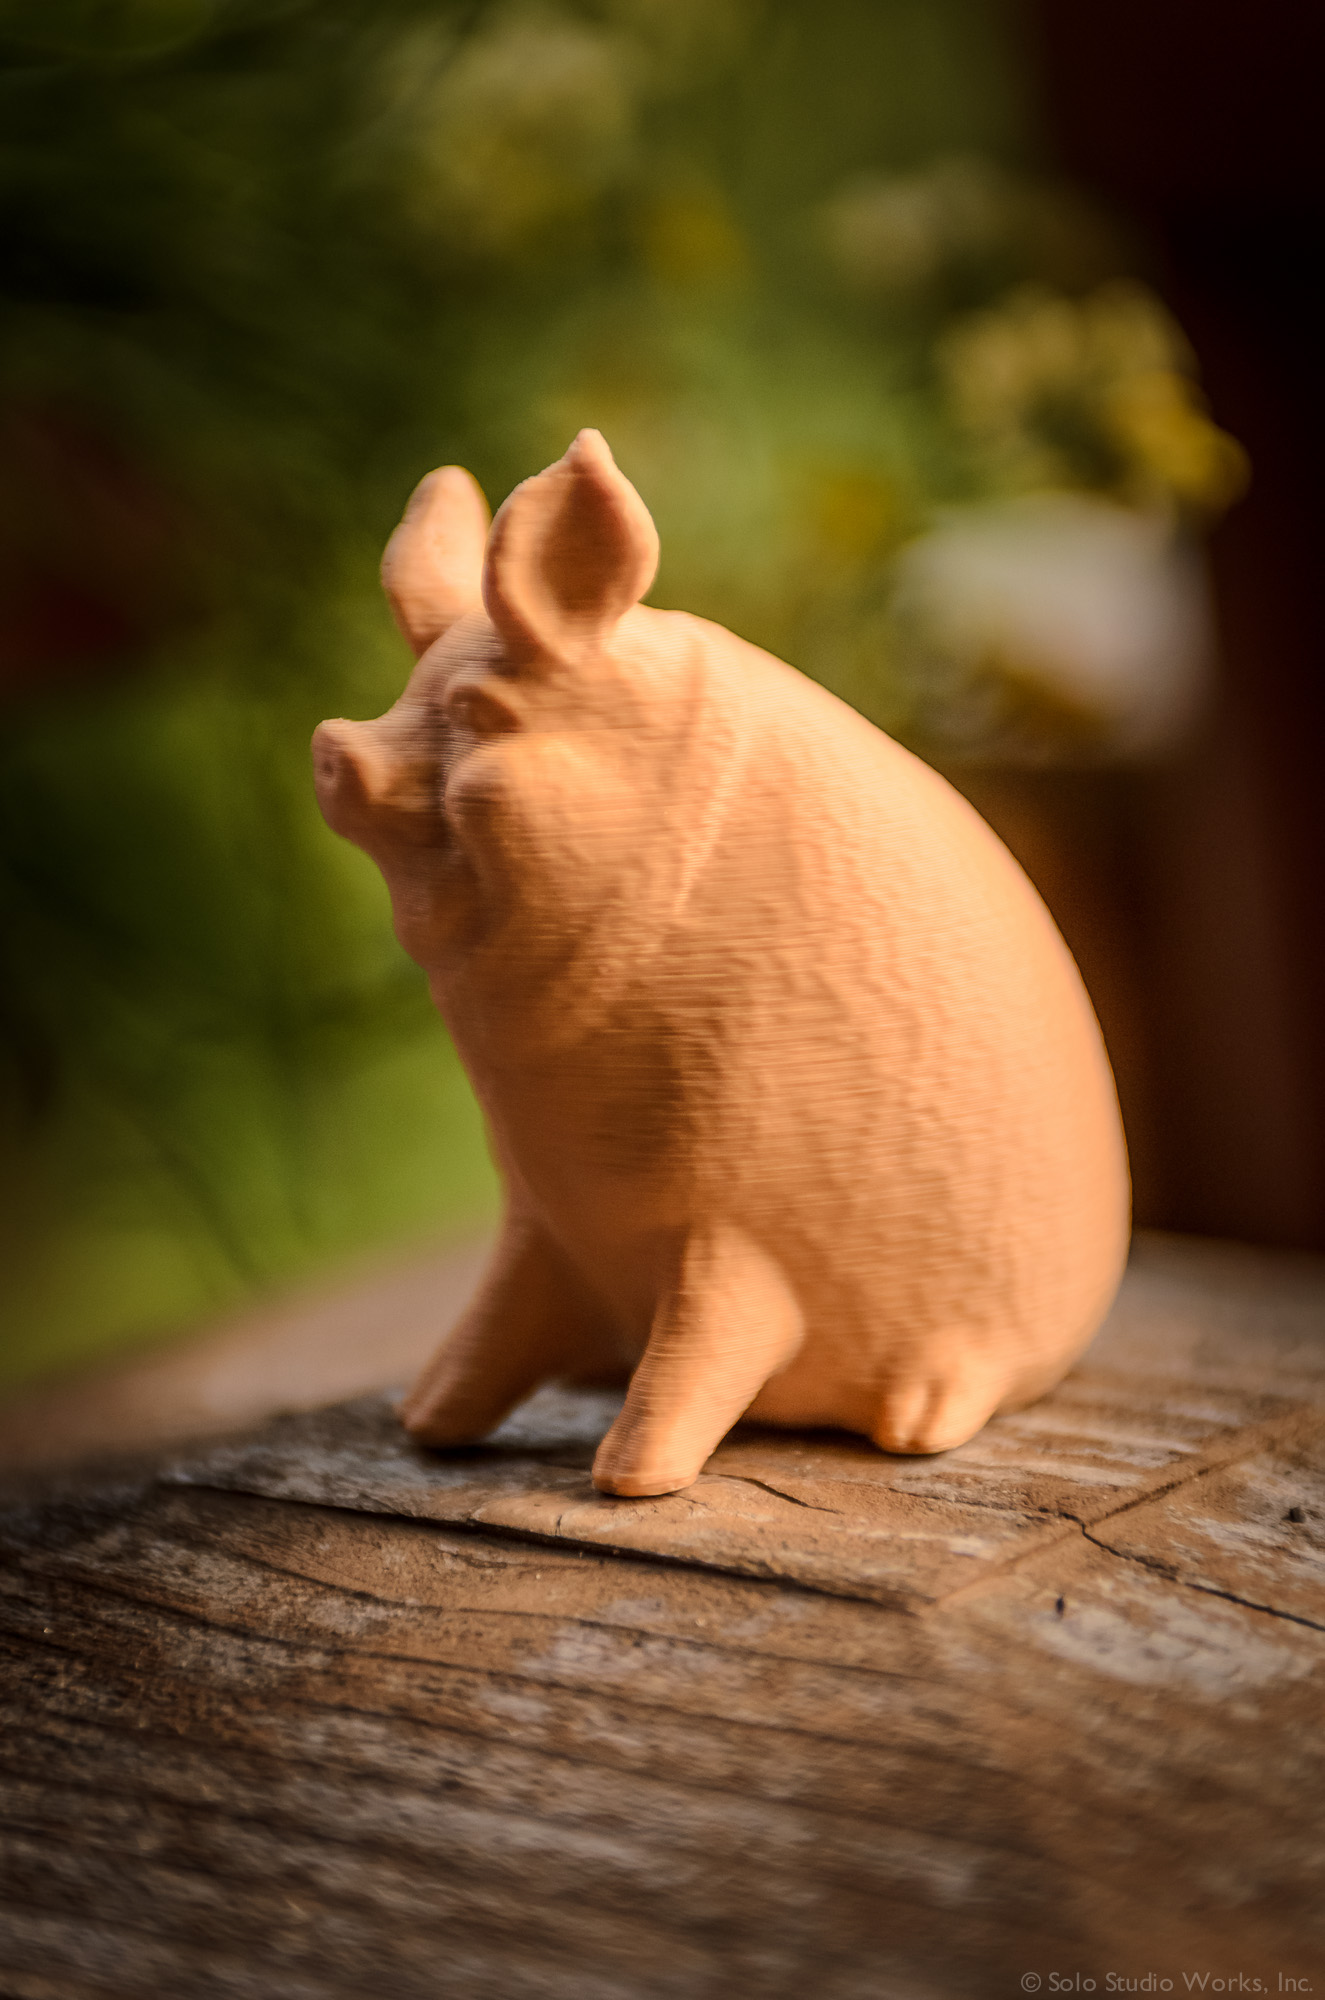
Garden Pig
This model is derived from a 123D Catch scan of a terracotta creature we found at a garage sale several years ago. I can find no artist or manufacturer markings on the original object, to credit them. The 123D Catch result was really clean. I did touch it up somewhat in MeshMixer. This thing is pre-sized at 70 mm high. The print in the photos was made on a Thing-O-Matic, in Makerbot Tan ABS. 2 shells, 0.2 layer thickness, and 10% fill. No raft or support.

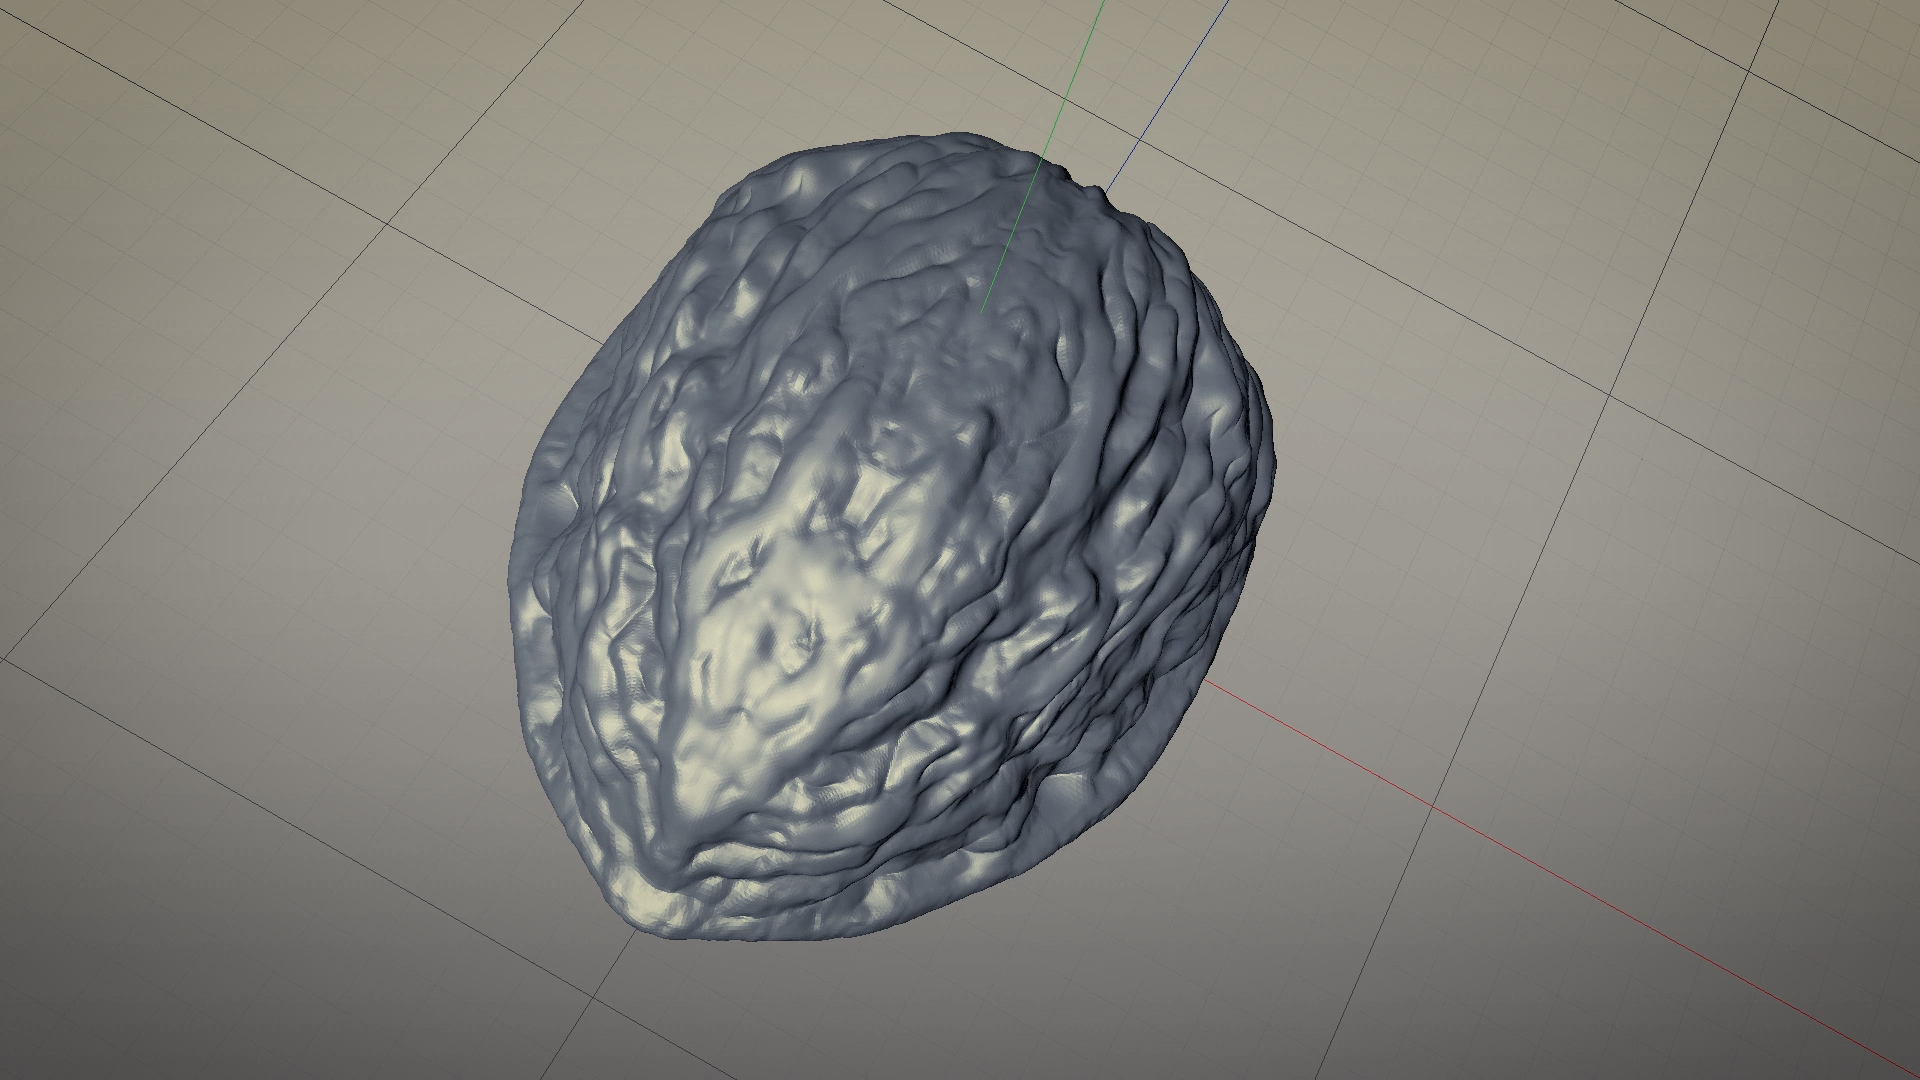
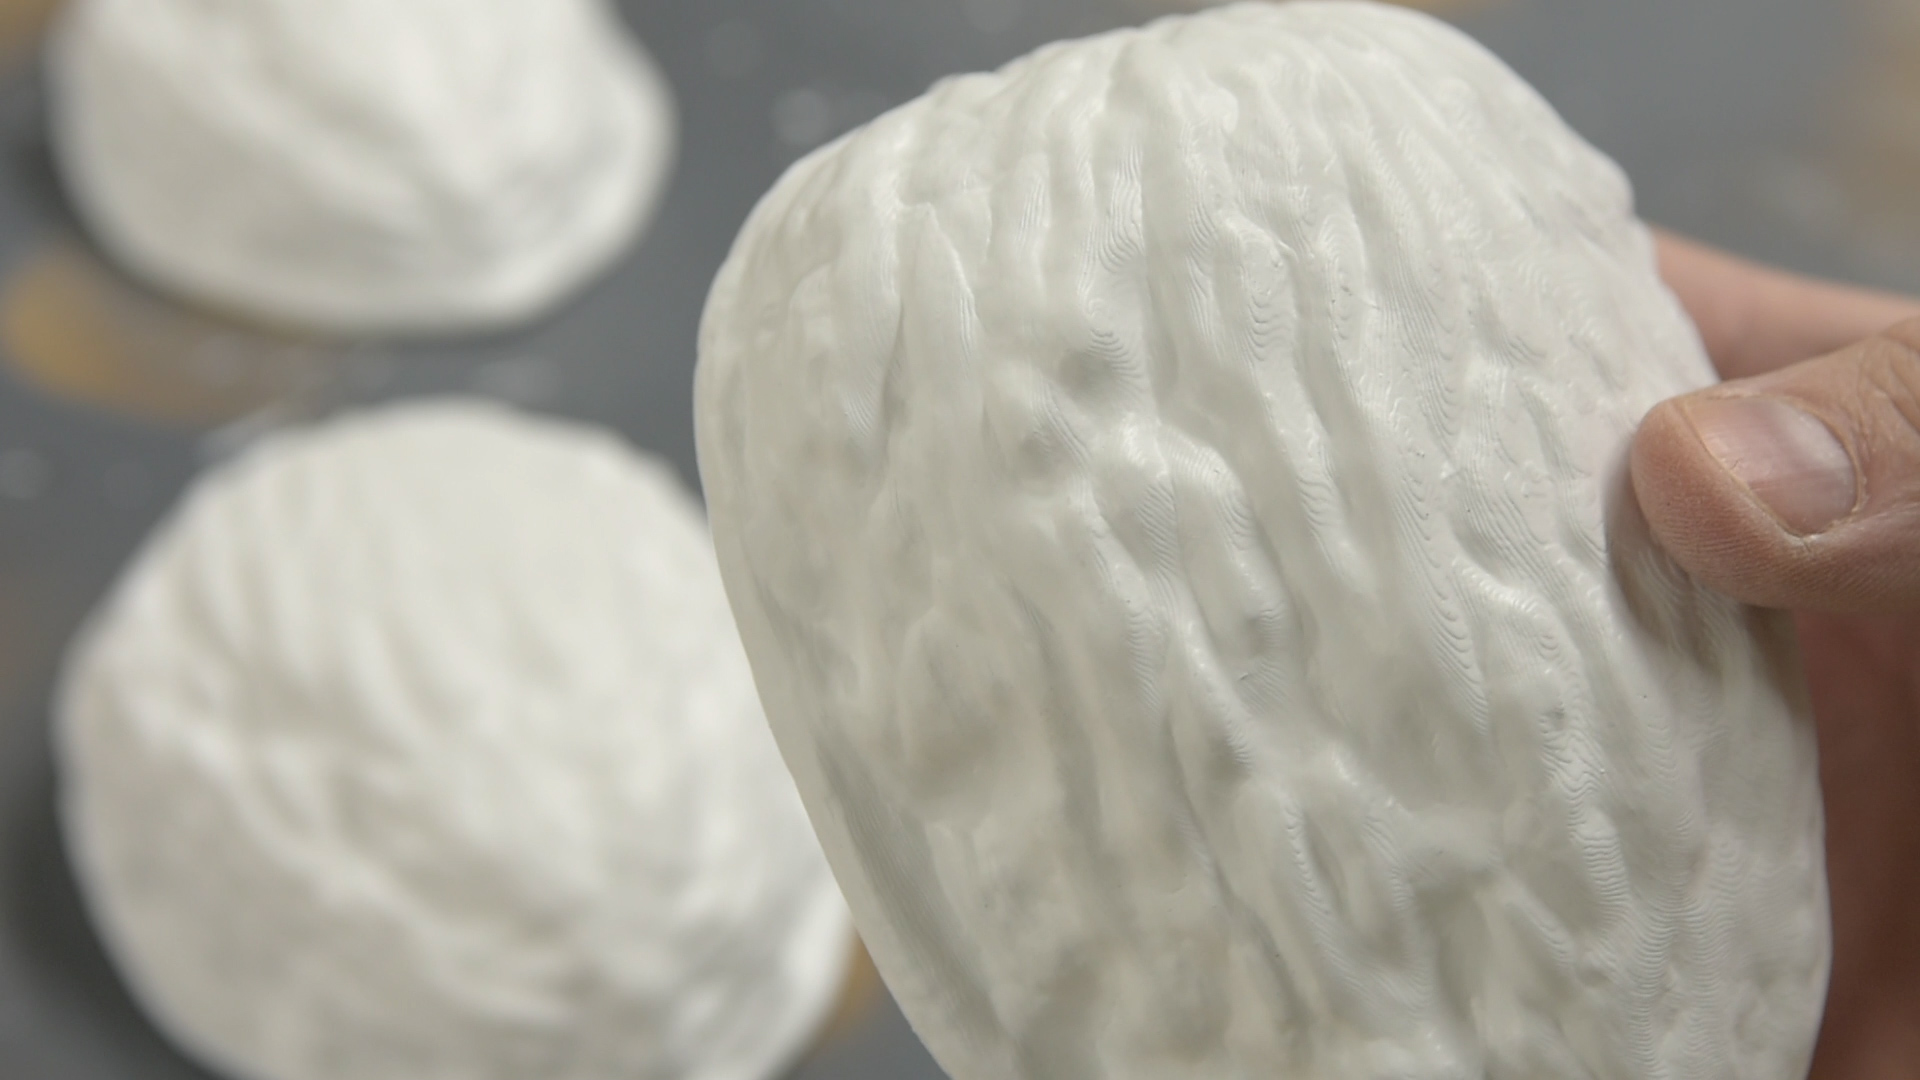
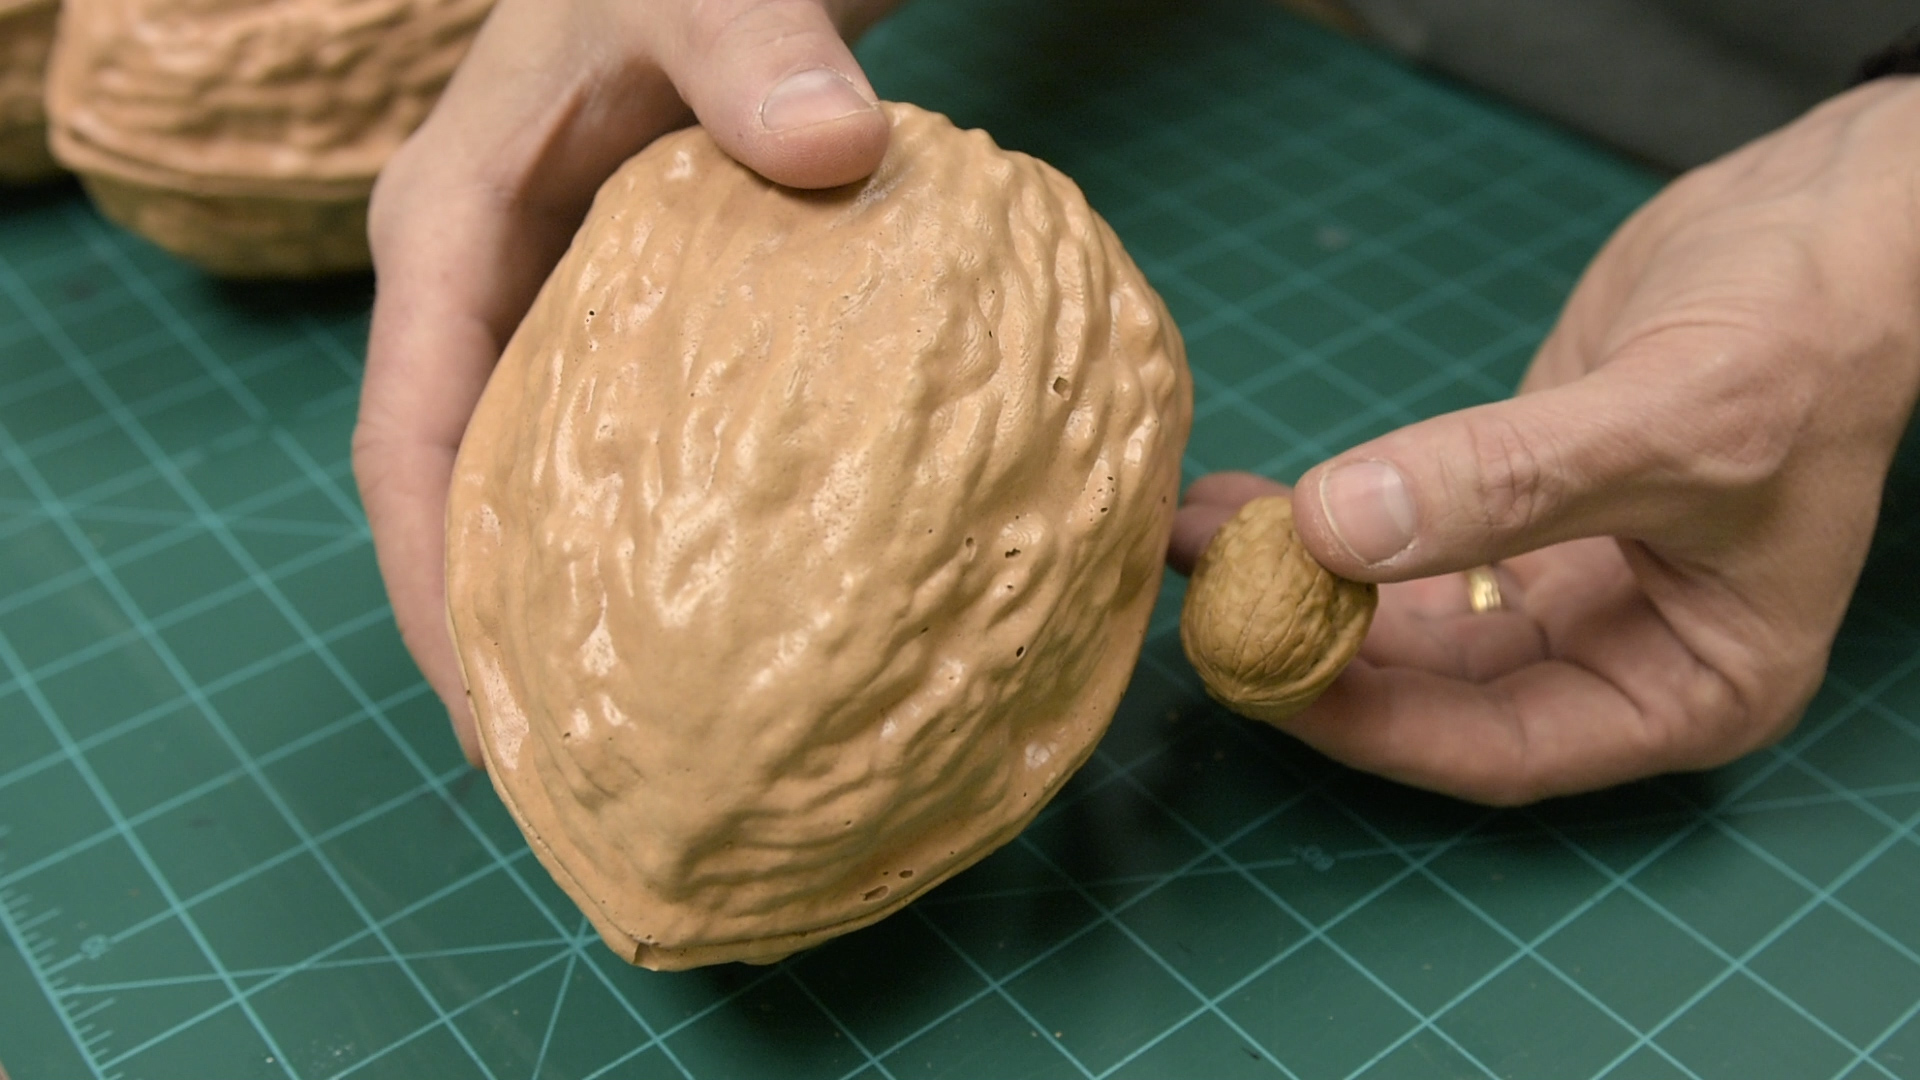
Giant Walnut
This model is sized in inches, so it will need to be imported appropriately. Currently it’s about 4.5” x 2.25” x 5.5”. That’s just one half of the shell. You will need to print a pair for a full nut.
I made silicone molds of mine and then cast them in “Water Putty”. Check out the video tutorial HERE.